EZCad 2 upgrade to EZCad 3
I was having problems with my ezcad2, it hangs and crashes. When it crashes, I usually lost all of my work.
When I tried to load the file again, it was emty. This is very annoying to loose work.
So after some checking I was recommended to upgrade to ezcad 3 since it is more stable.
I ordered the ezcad 3 (DLC2-M4-2D) from aliexpress Rock Solid Laser company.
It cost $1600 + shipping. Currently they have this card for around $1173
2.5D license is $160 extra.
Anyway, it is still worth every penny.
Remember to order an 12V 3A OR a 24V 3A to 12V 3A stepdown converter.
With the stepdown converter you can use the 24V powersupply that is inside the machine.
This is for powering the controller.
What you gain of upgrading to EZcad 3 is:
✓ 64Bit software.
✓ No insufficient memory problems like ezcad 2.
✓ 4 axis controll.
✓ Support STL files.
✓ Support all type fiber laser source.
✓ Support 10 input, 8 output ports.
✓ Remote via network.
and more...
If I can do it, everyone can do it.
Took 5 days from it was shipped to I receive it by fedex.
It was well packed.
Look at this beauty.
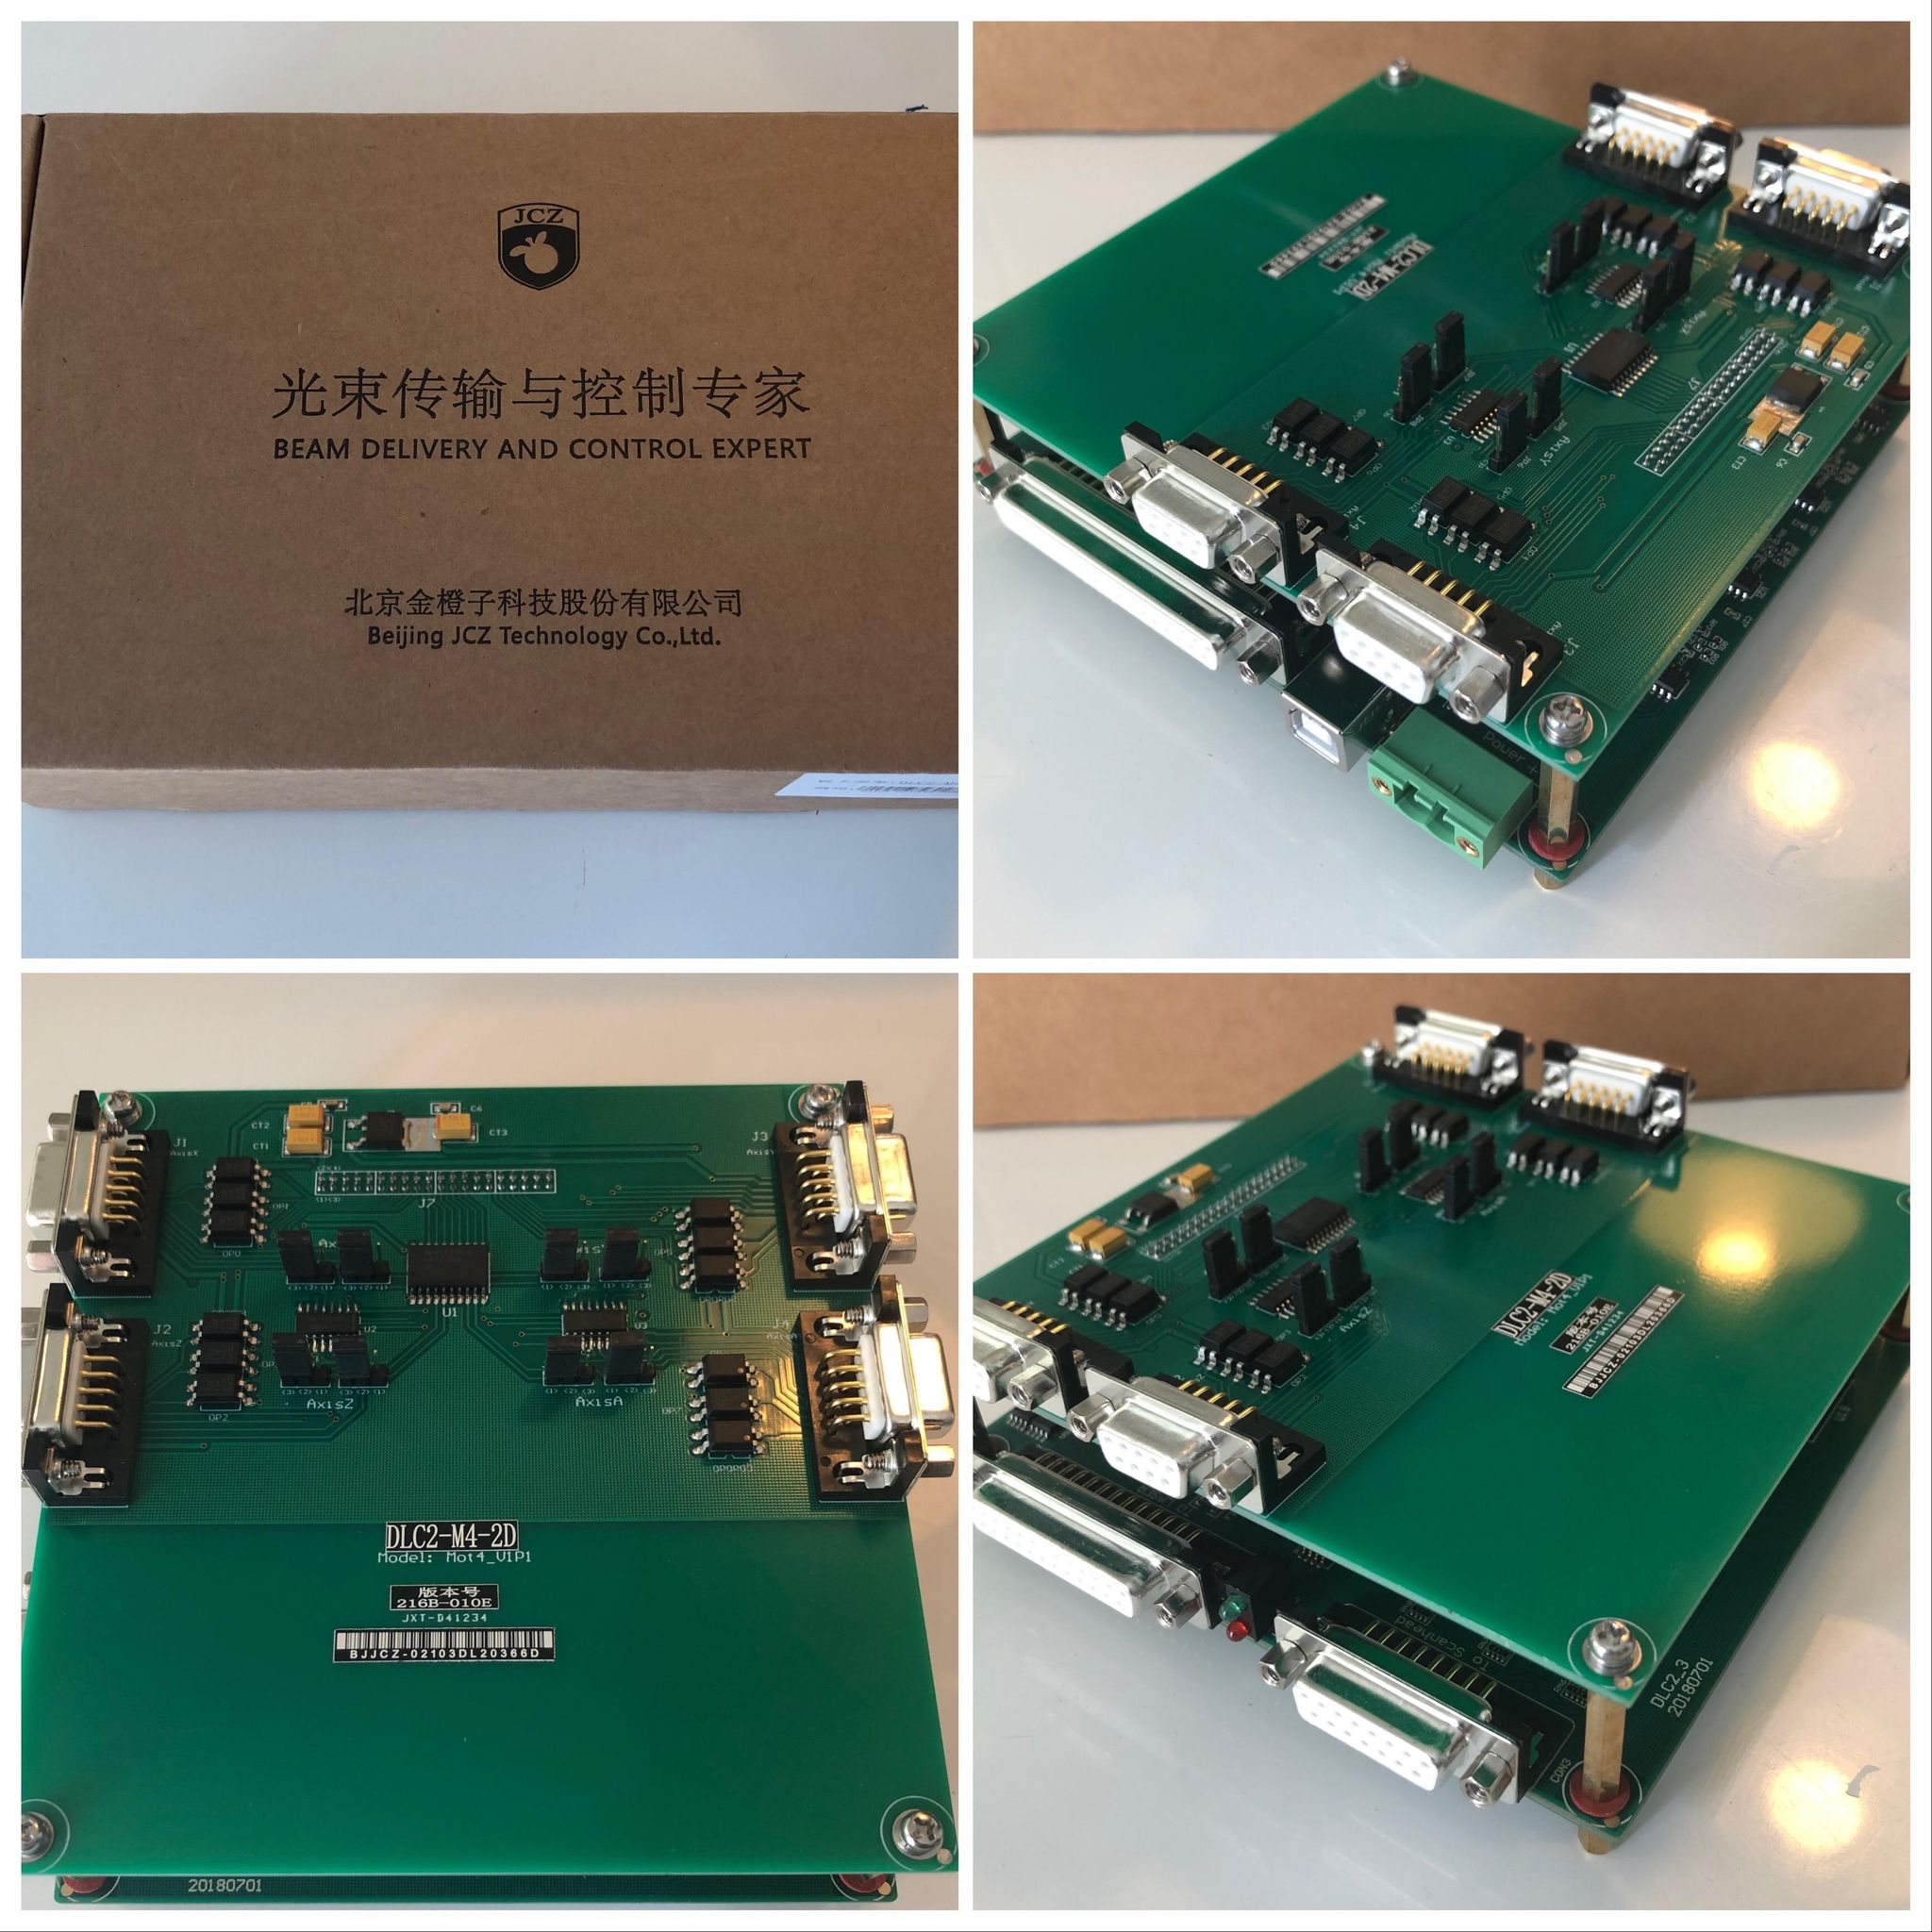
It looks big, but it is only around 12x13cm
Layout of connectors bottom board
Layout of connectors top board
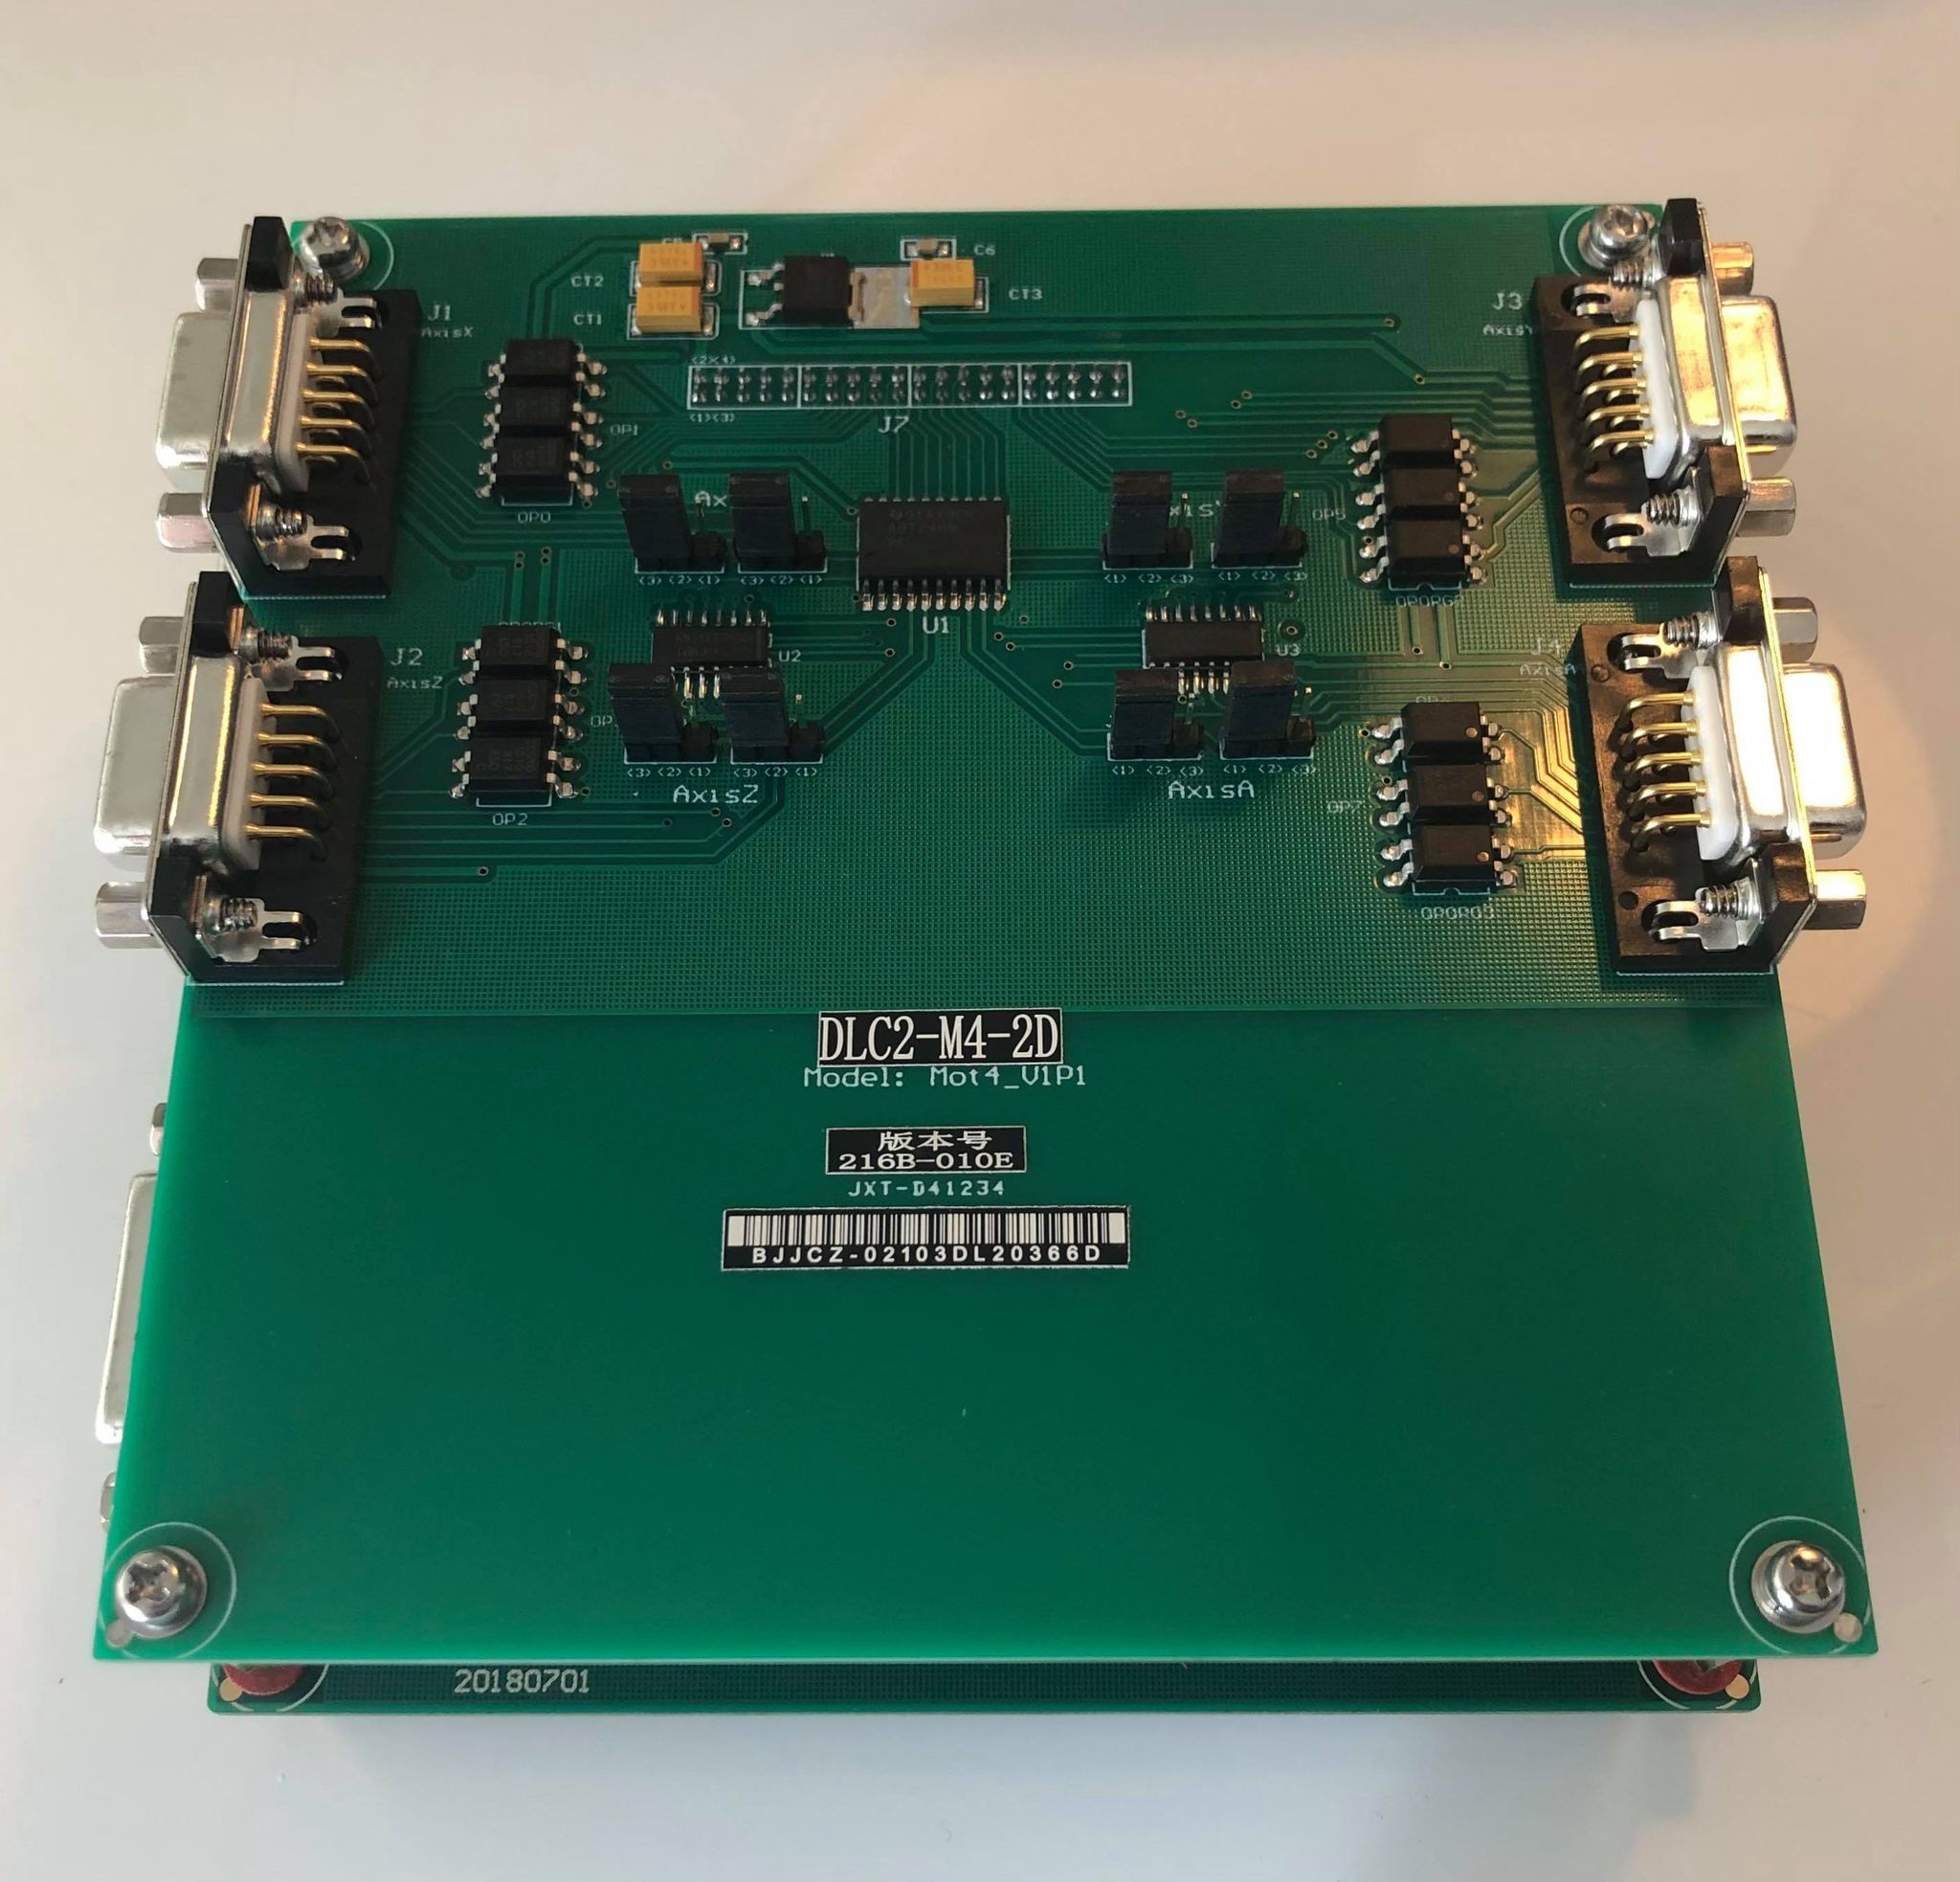
On top you see the XYZA axis controllers
A for rotary
Z for lifting column
XY for motorized XY table.

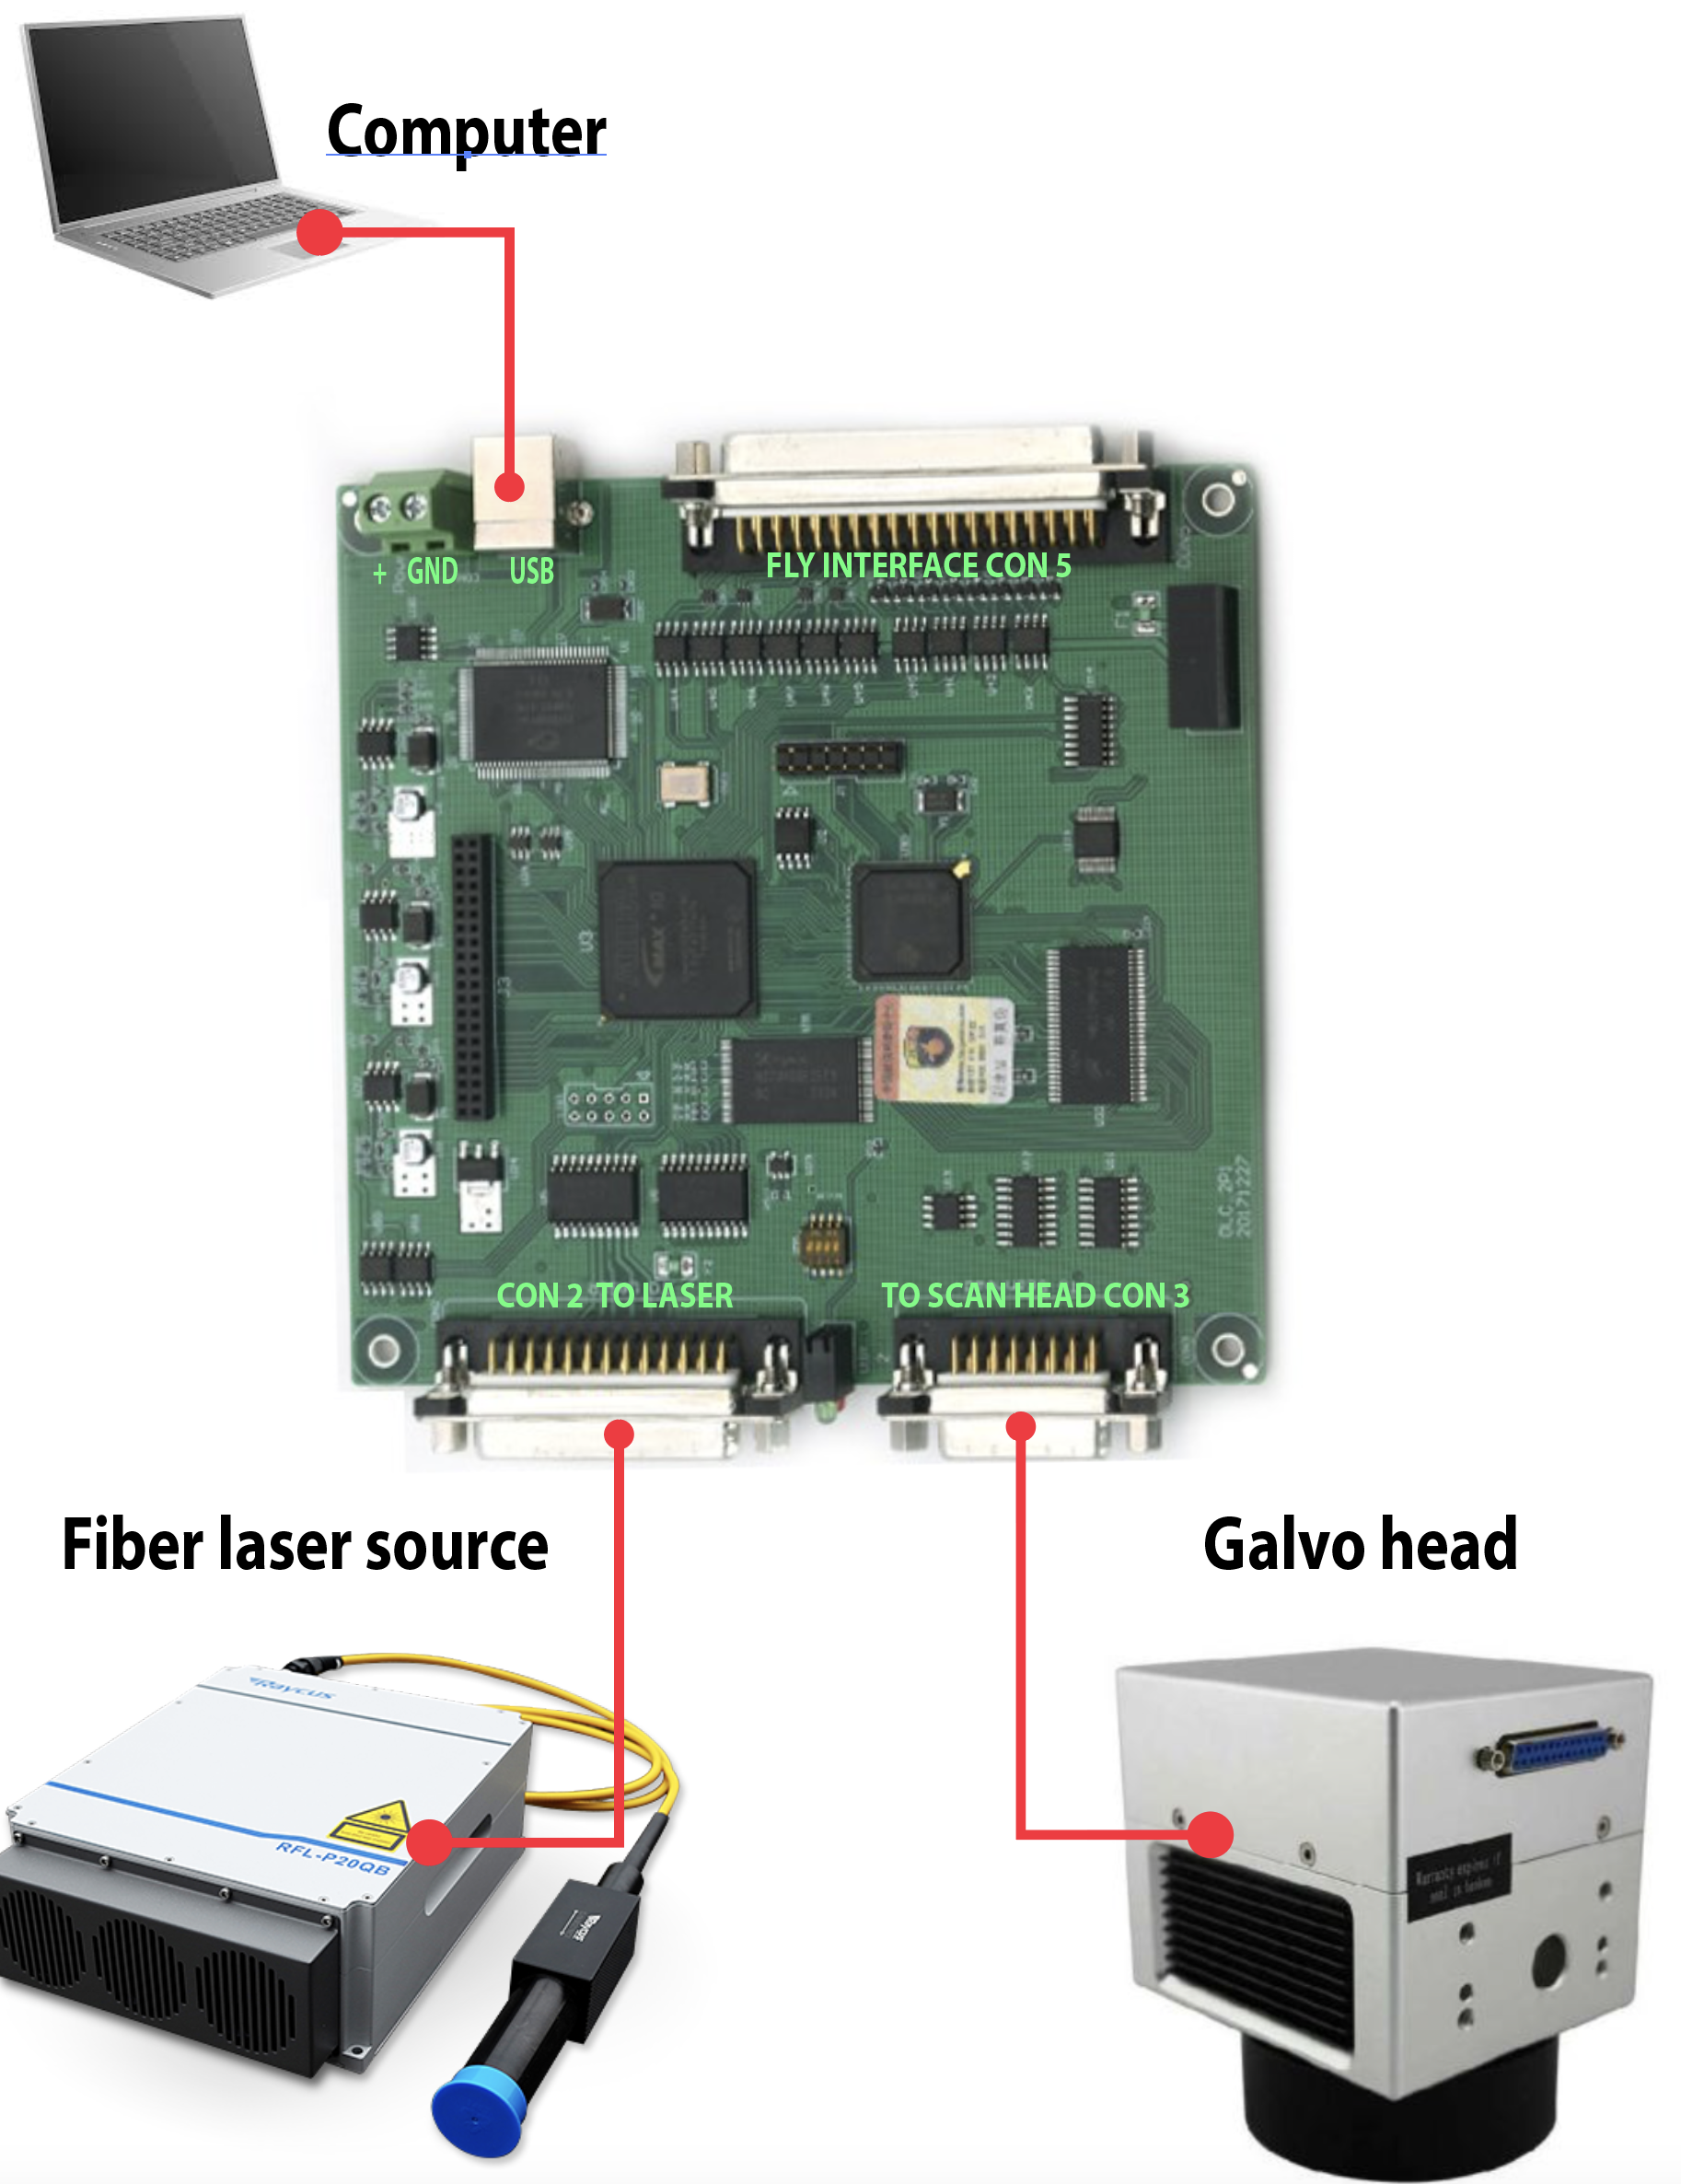
Here is my fiber laser case with top lid and side panel removed.
You can see the old ezcad2 card on top.
I unplugged all connections from the old board and removed
the ezcad2 controller.
I had a thin aluminum sheet that I made holes for the new controller.
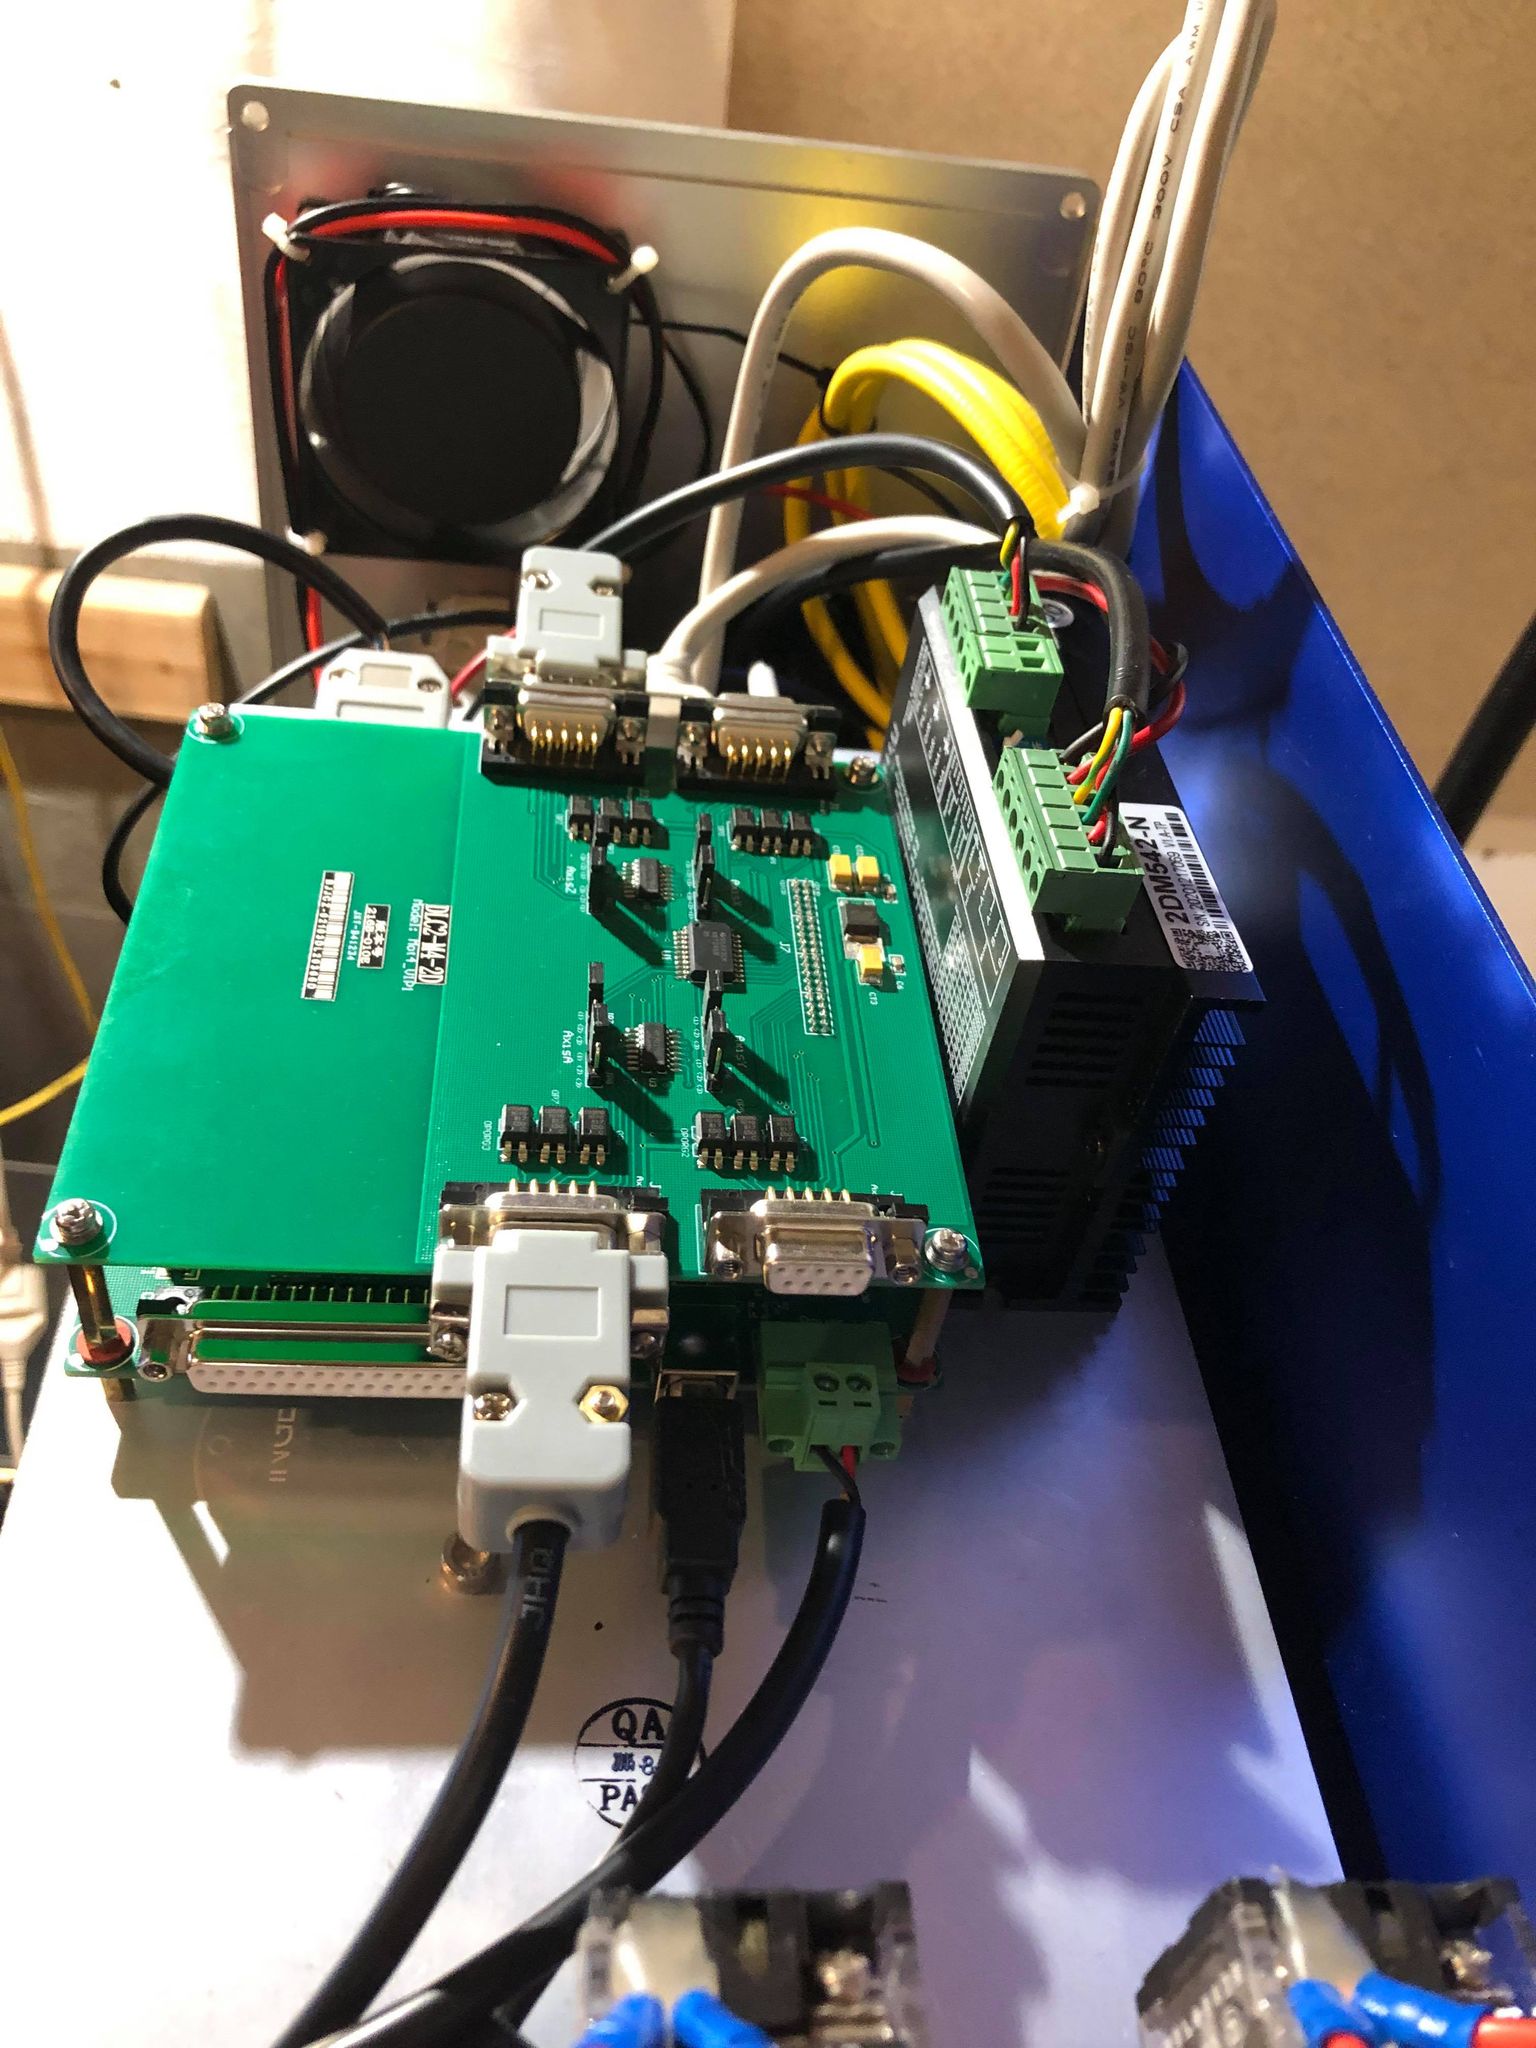
Here is the new controller installed in my machine and plugged in.
It is really Plug'n'Play
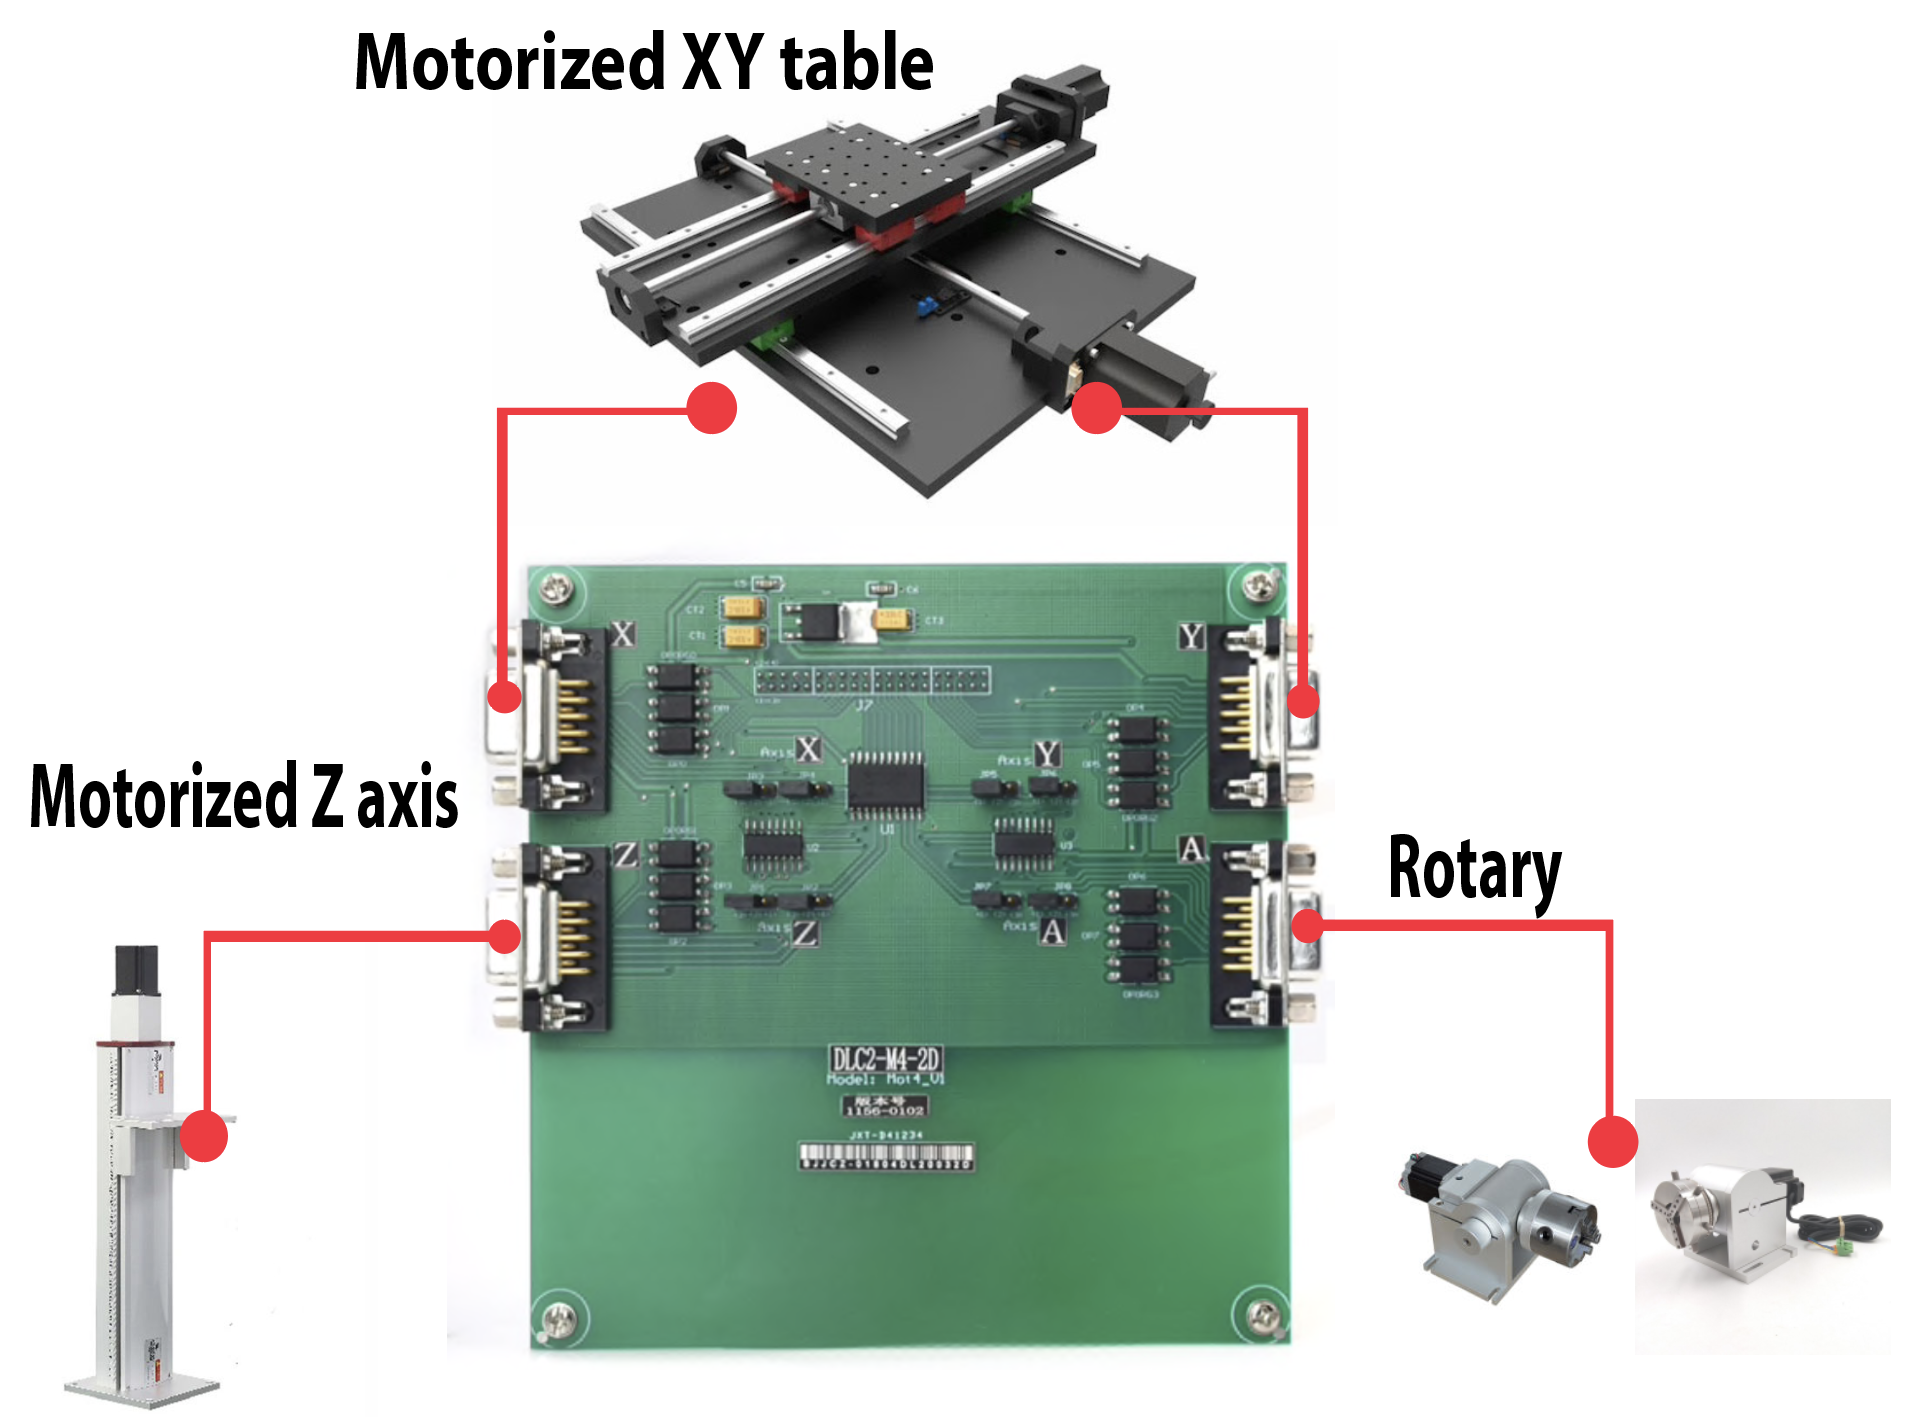
I had to solder the DB9 connector for my motorized z axis and rotary.
BJJCZ should have these prewired with a 40 cm cable.
The install have been even faster hehe
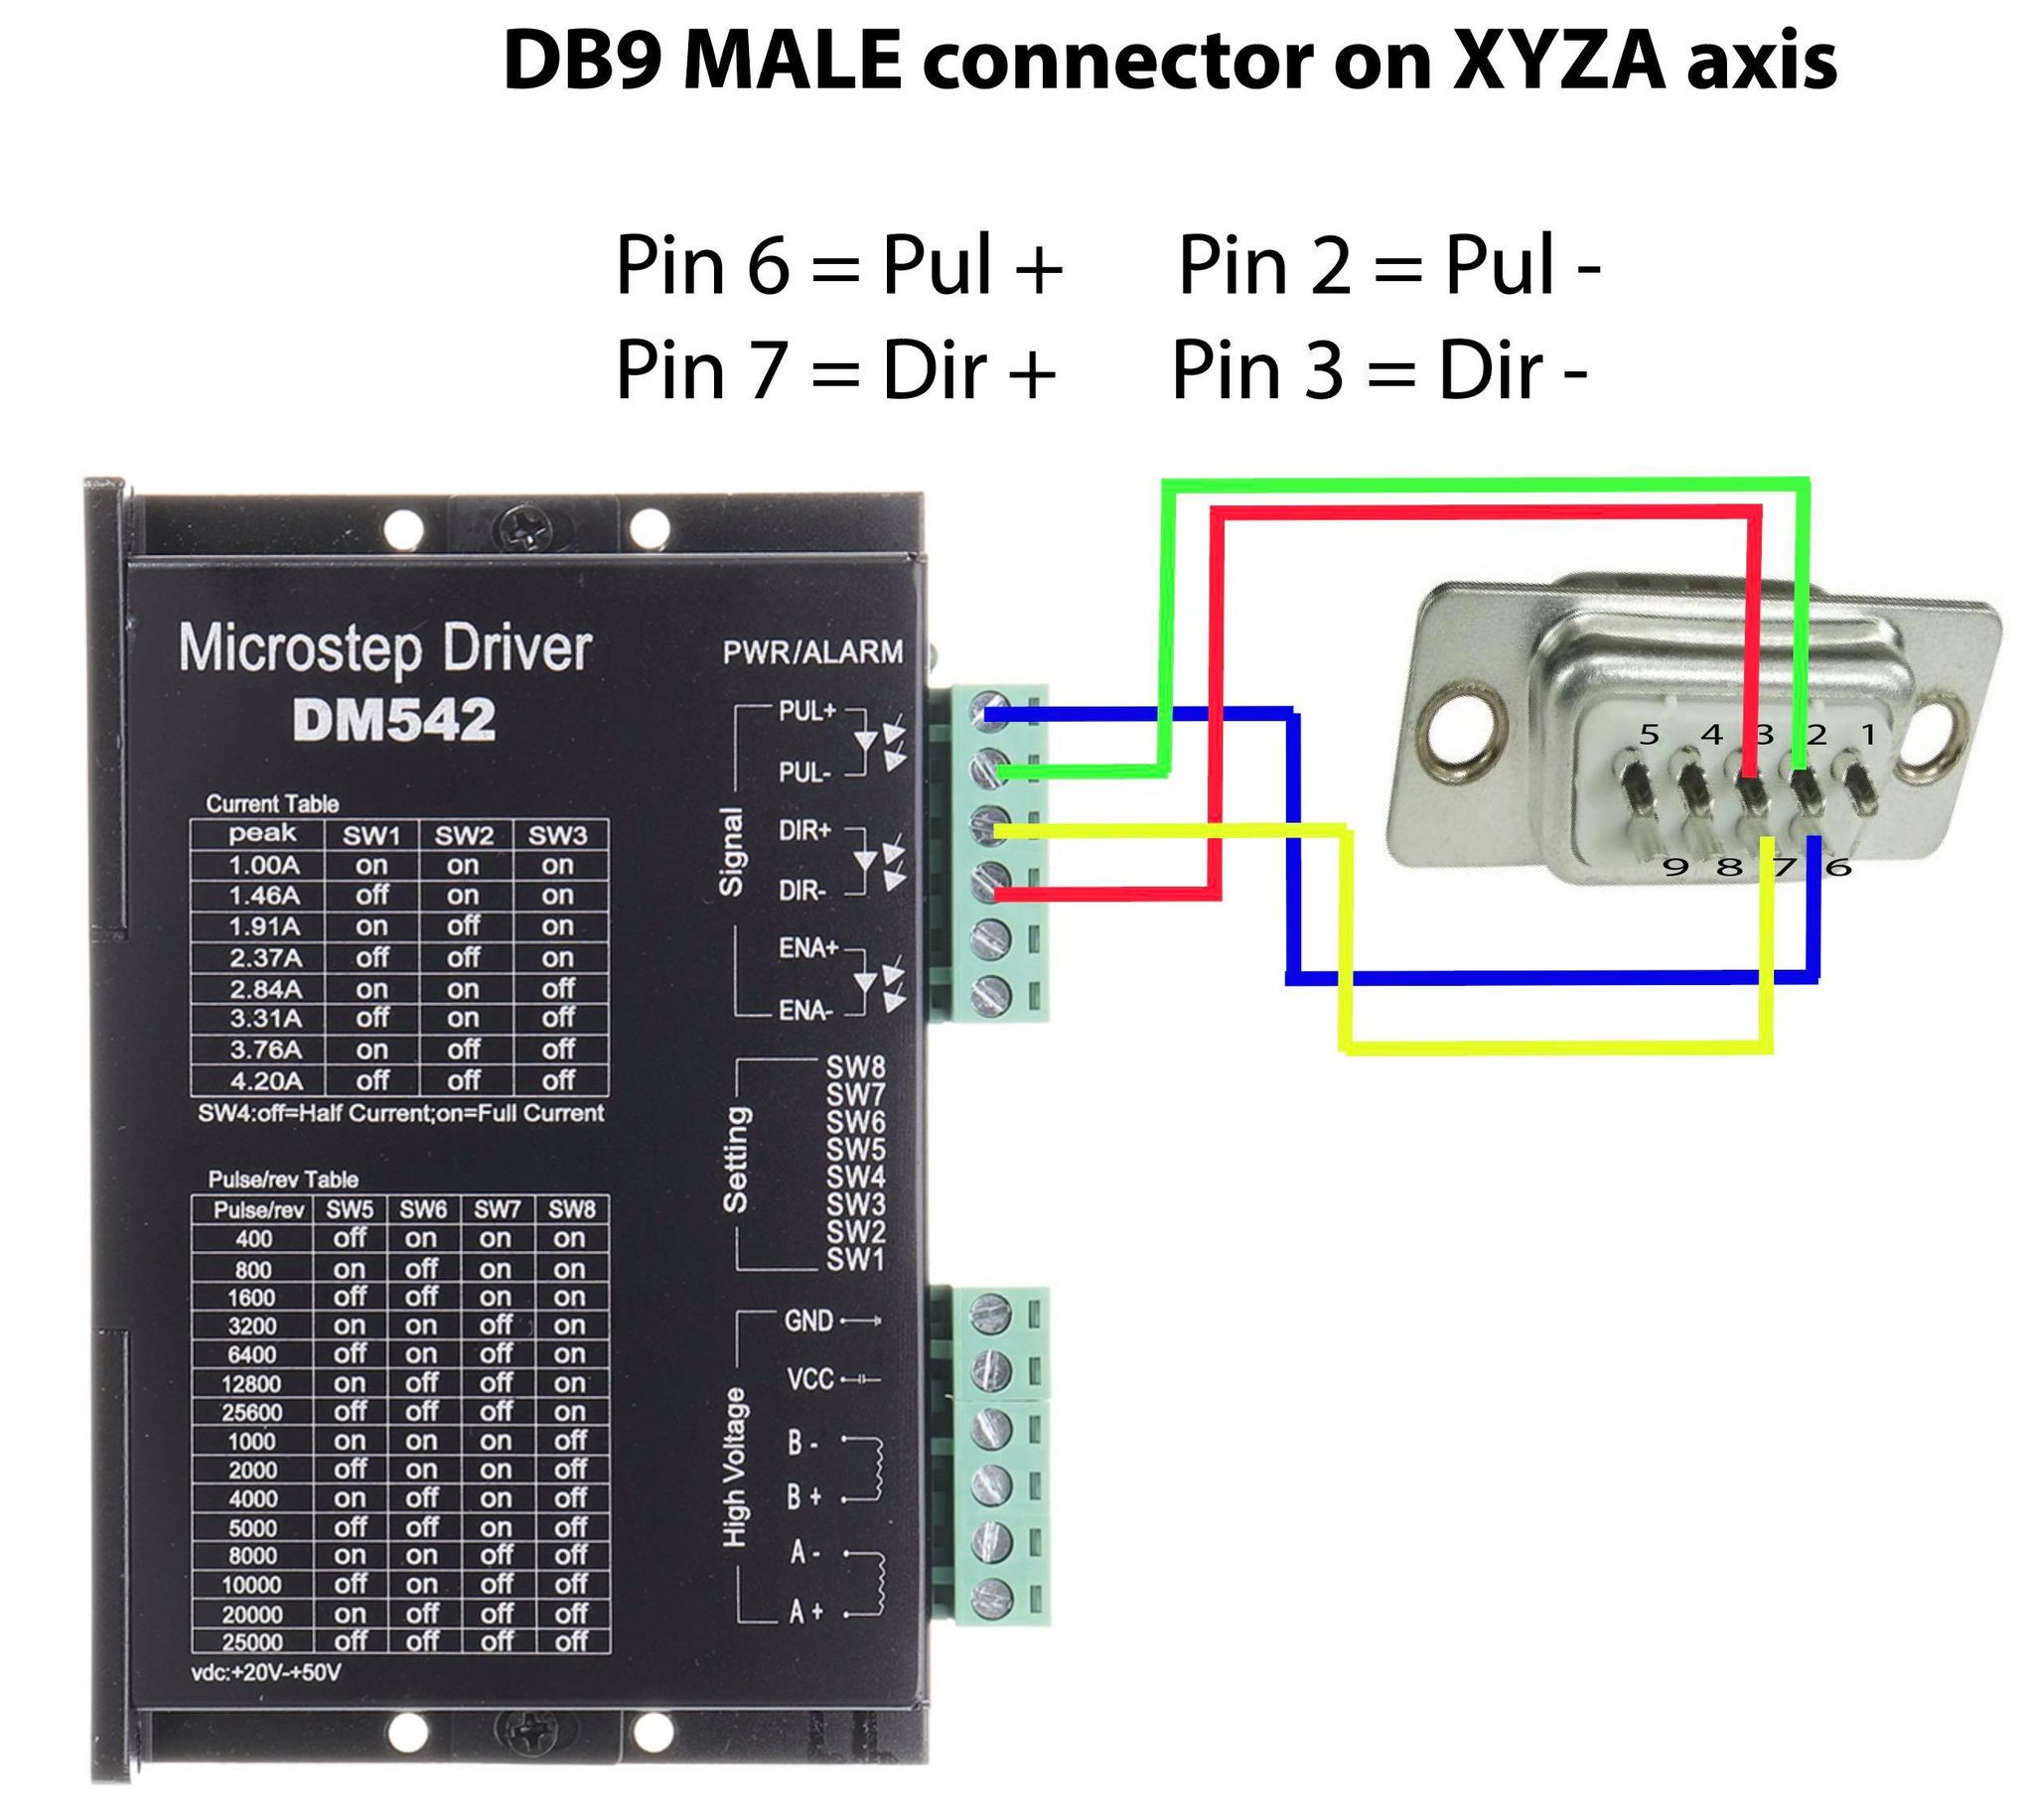
DB9 XYZA wiring diagram (ONE DRIVE FOR EACH AXIS)
You need to wire each axis like the diagram.
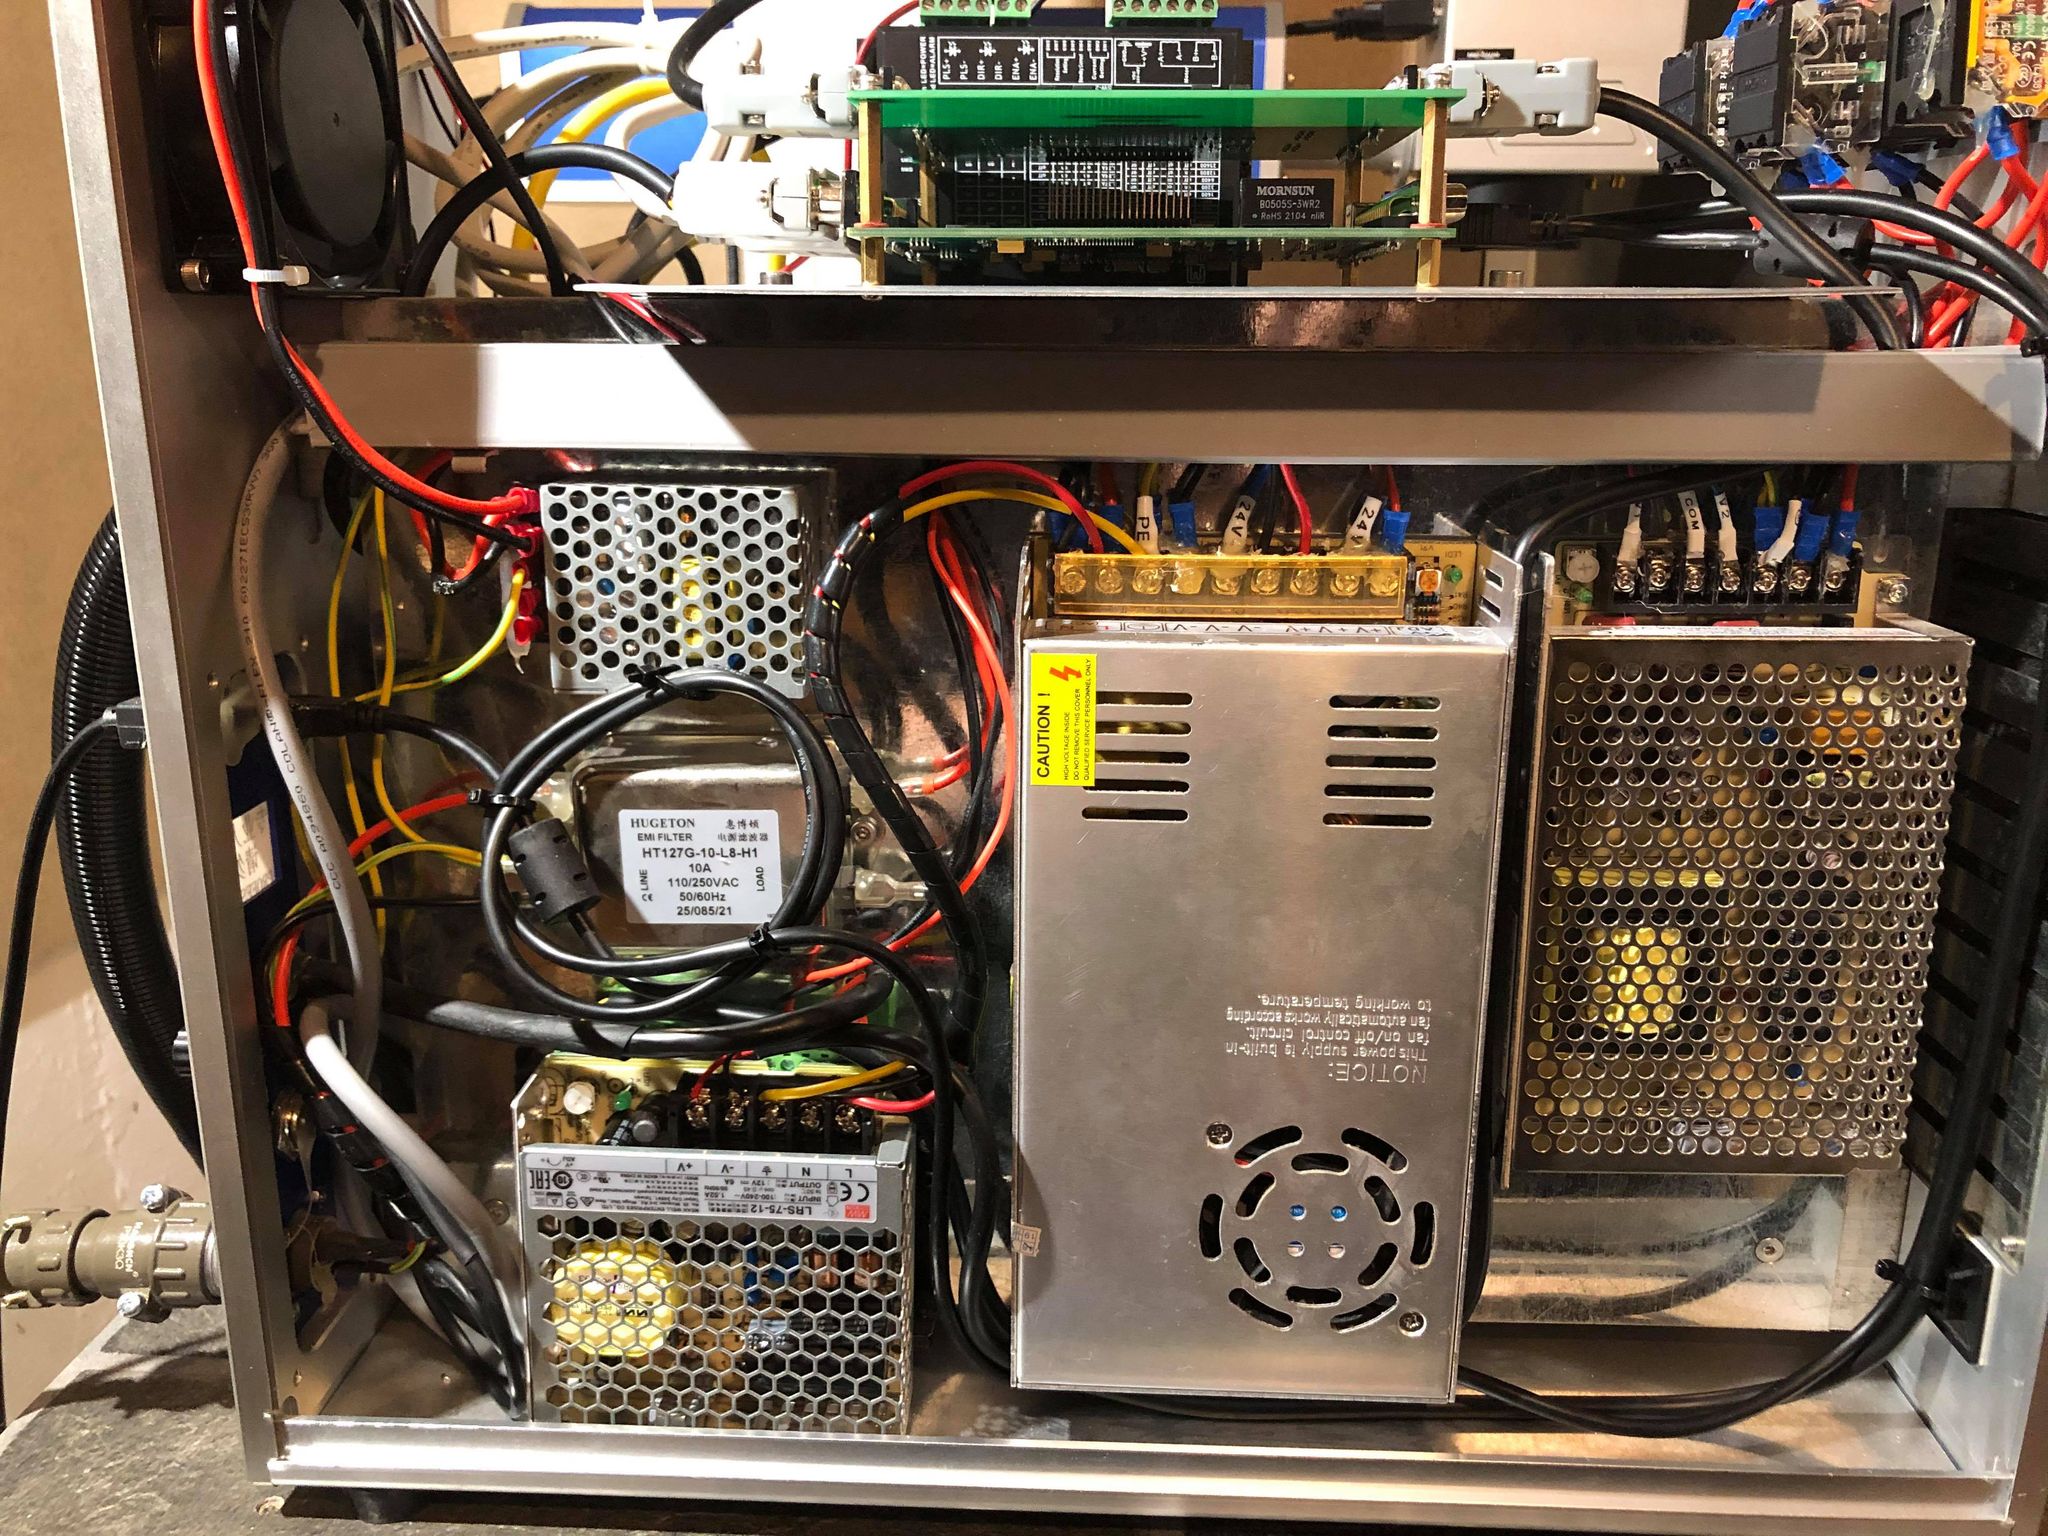
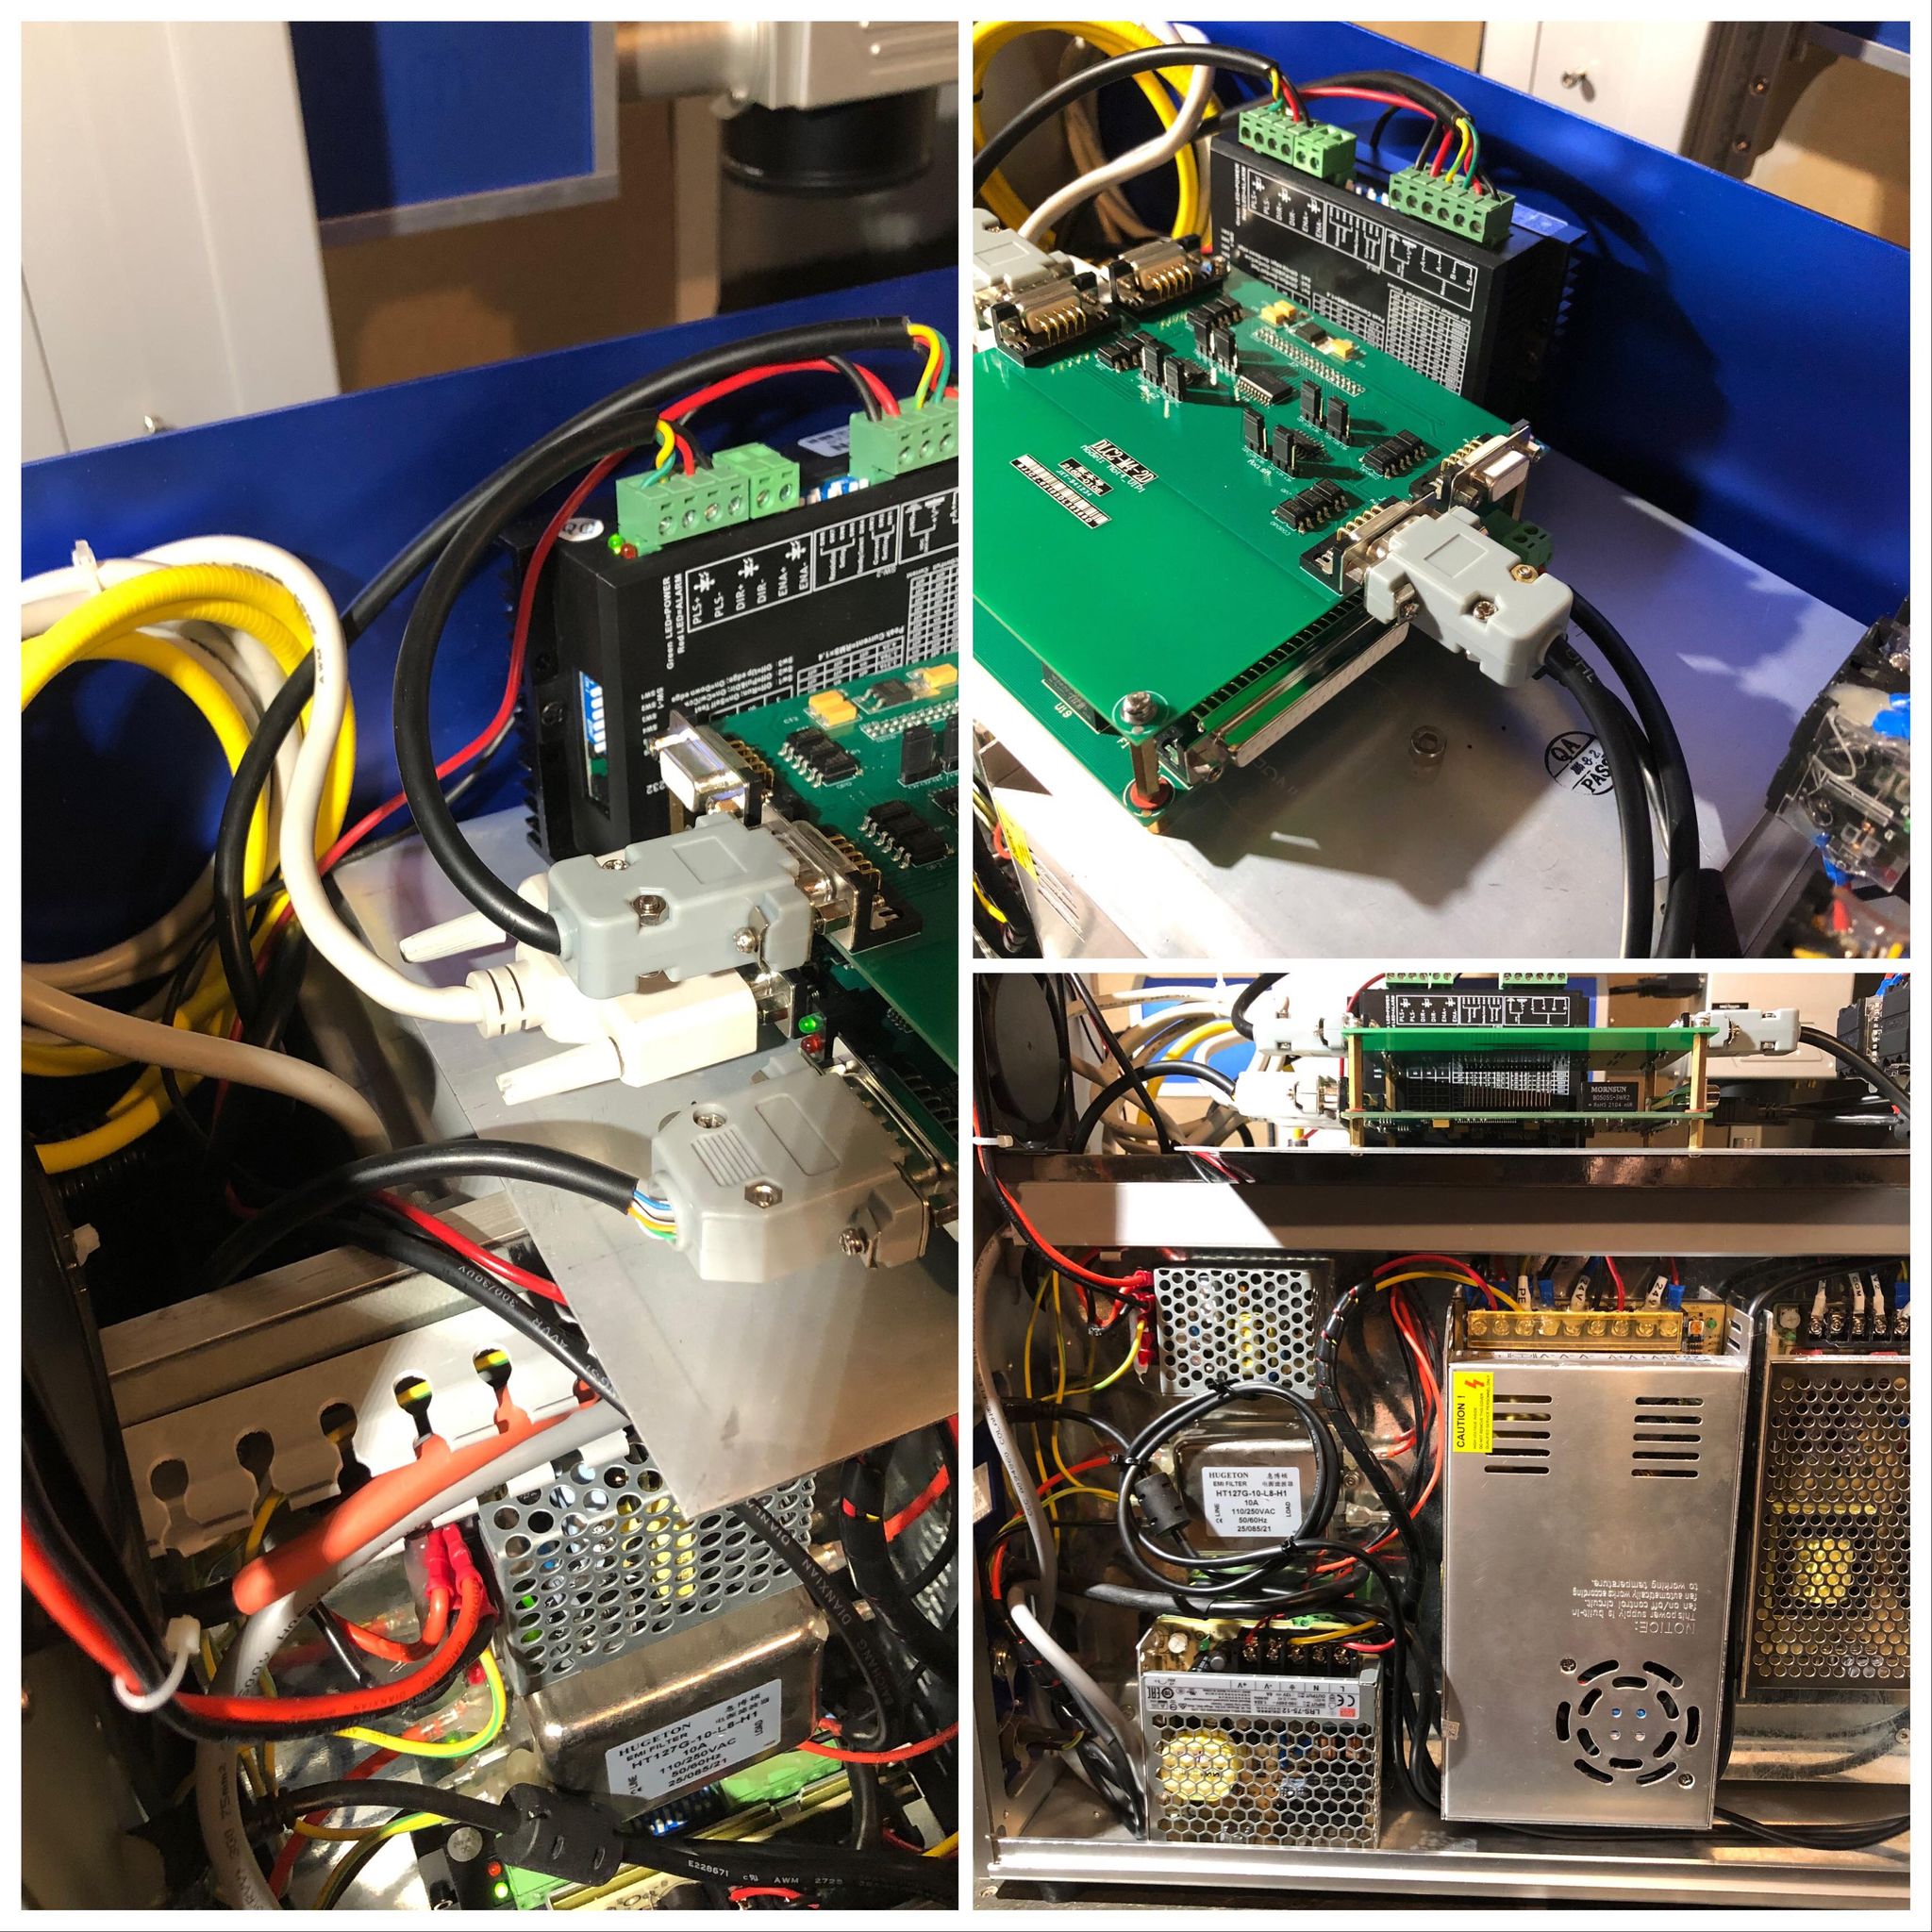
Here is my machine finished and tidy up cables.
I think it took around 20 minutes from I started to I was finished
installing the ezcad 3 controller.
But it will take a bit longer if you dont have the motorized Z-axis.
Look at my motorized zaxis build here
EZCad 3 Calibration:
If you never have done this, it looks very confusing. What to do here? It is pretty easy,
follow the manual and do the measuring order below.
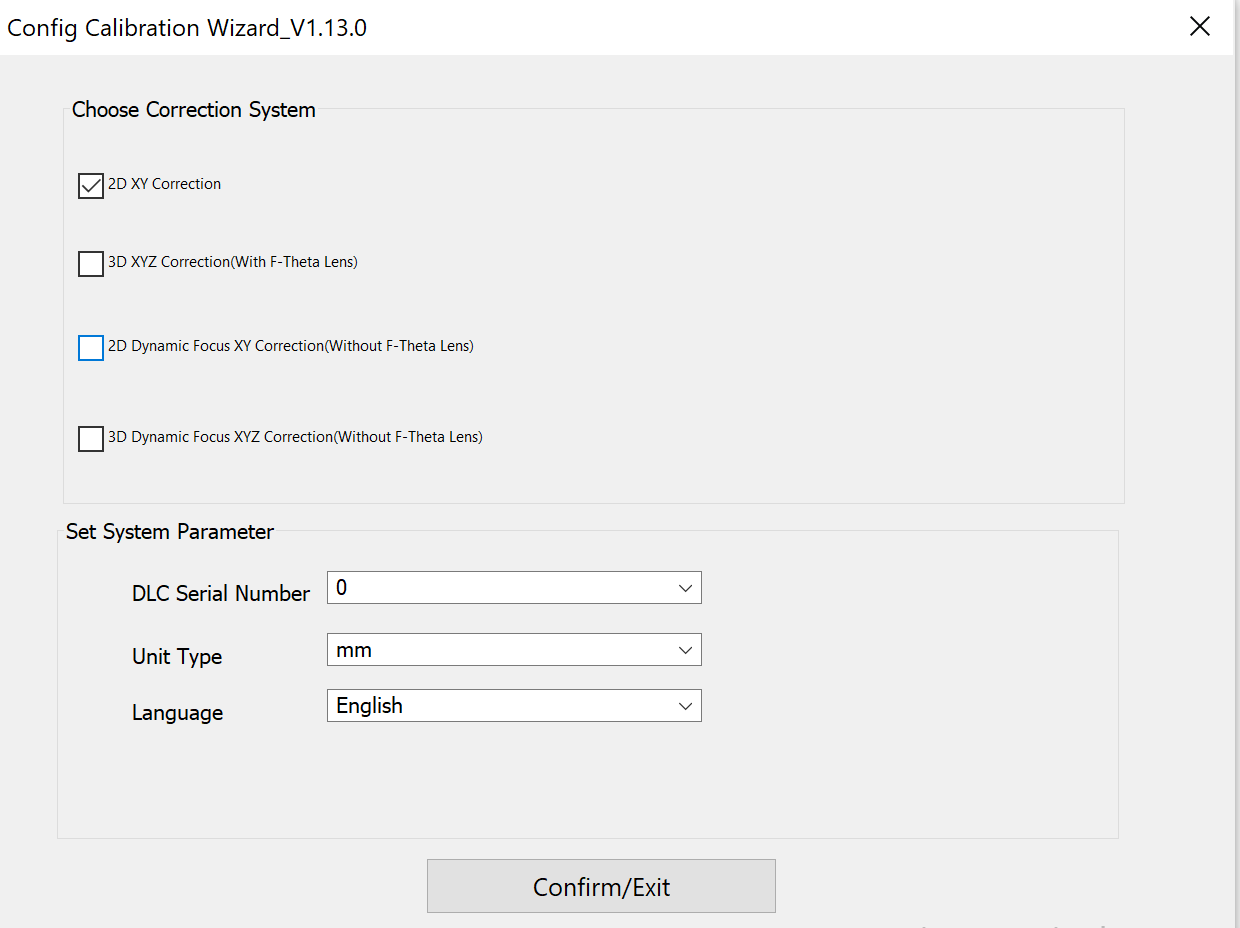
Start the calibration wizard
Click on 2D XY Correction, once selected click “Confirm/Exit”
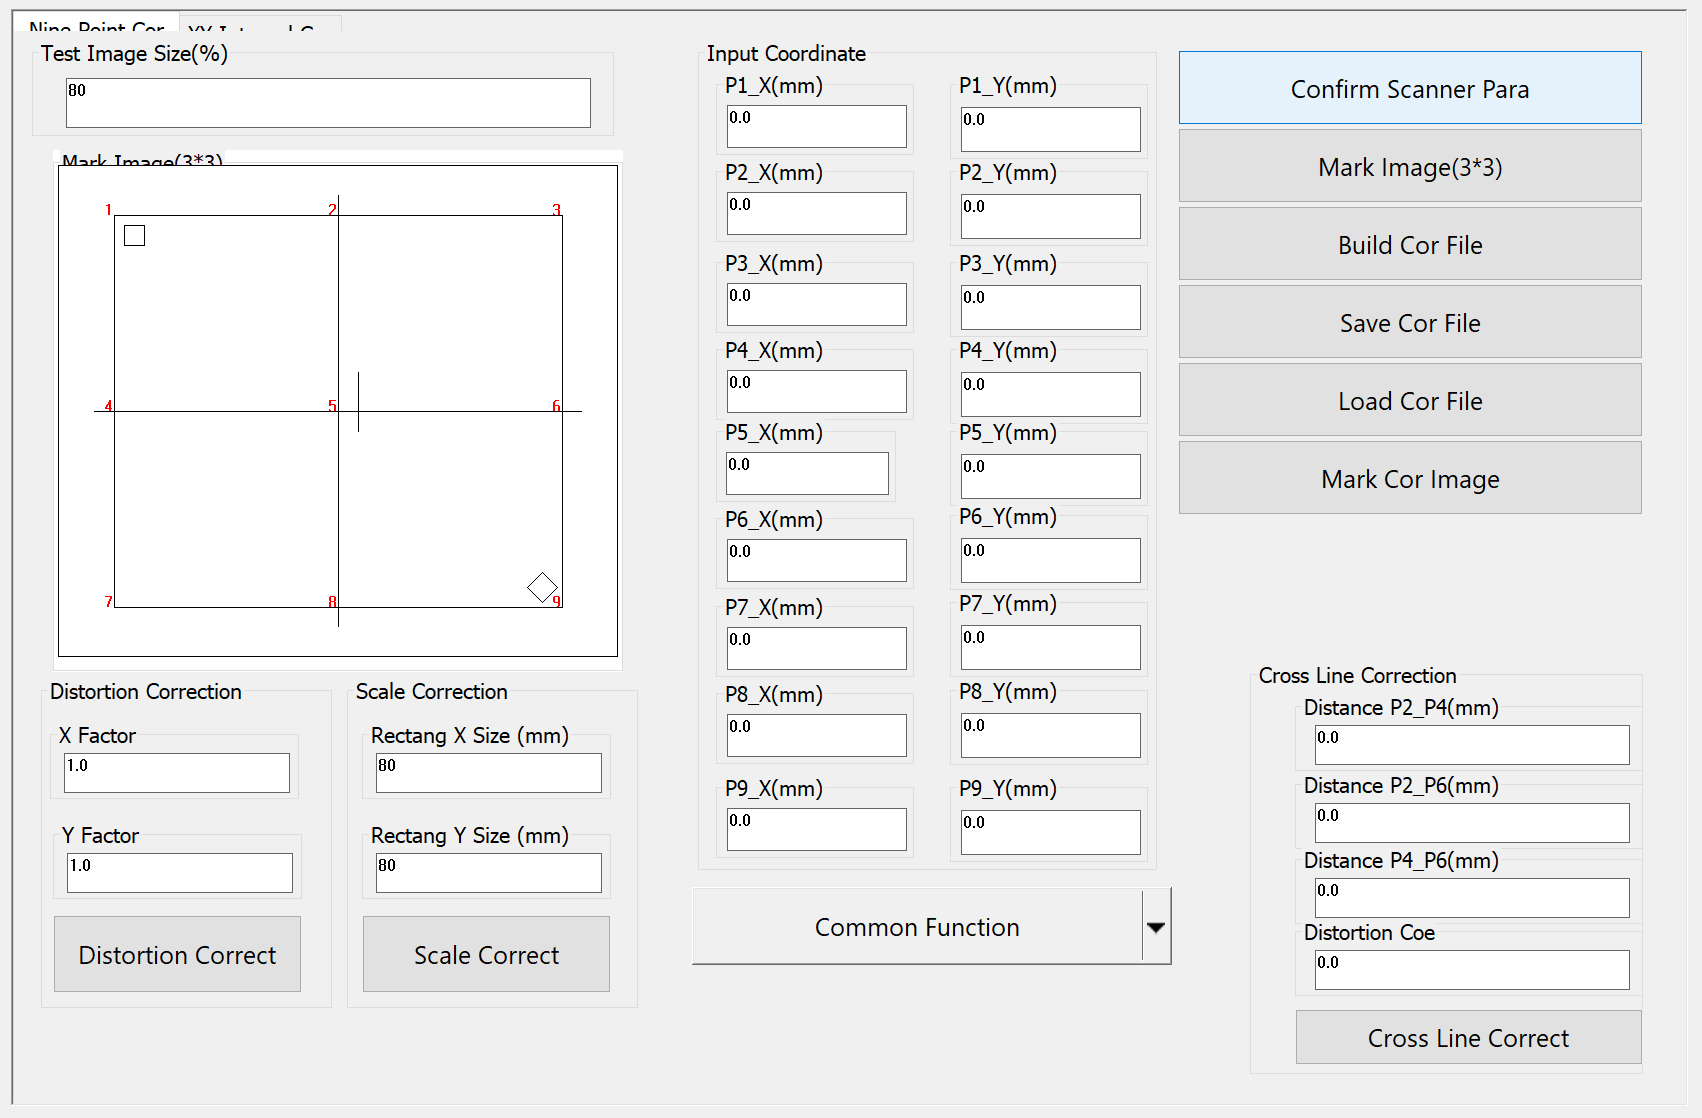
You will now see the 9 point calibration screen

Click on "confirm scanner para"
Click on Galvo 2 = X YES
Reverse X = NO
Reverse Y = NO
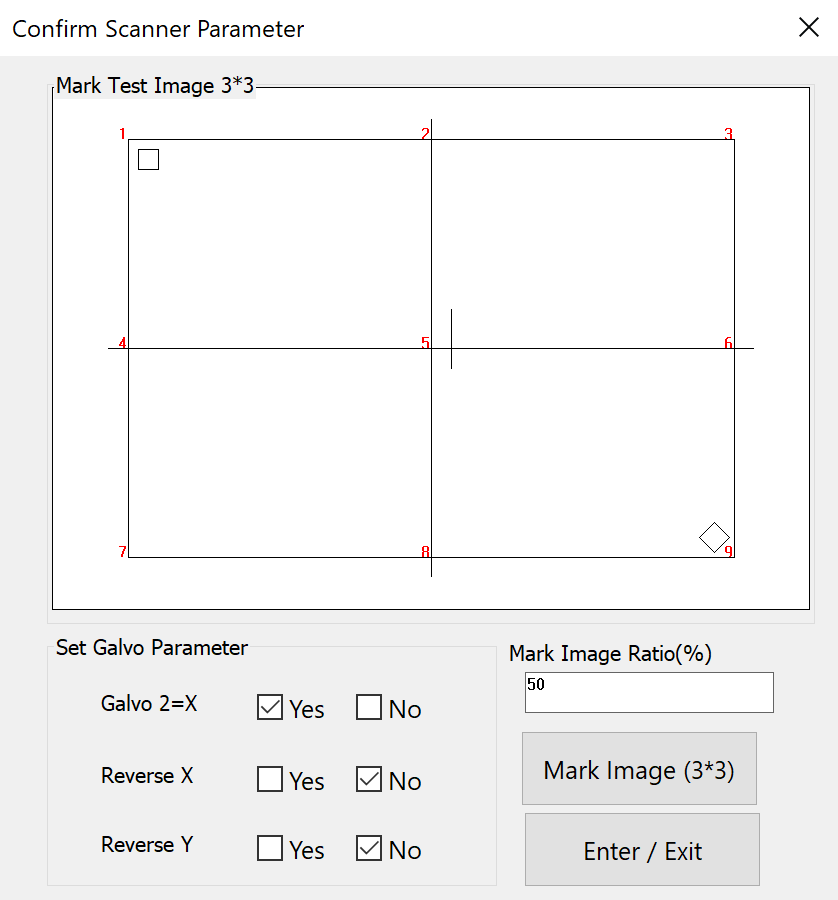
Once set click “Enter/Exit”
Place a large scrap piece on the bed then click “Mark Image(3*3)”.
Machine will mark with the following image.
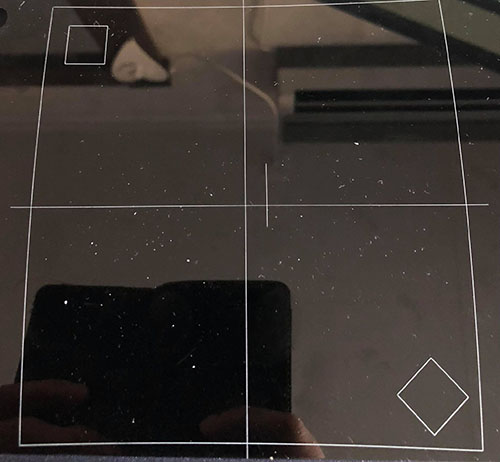
Use ruler or a measuring calipers to take the corresponding coordinates
of each point, take the absolute value (accurate to one decimal point),
and fill in the corresponding coordinates.
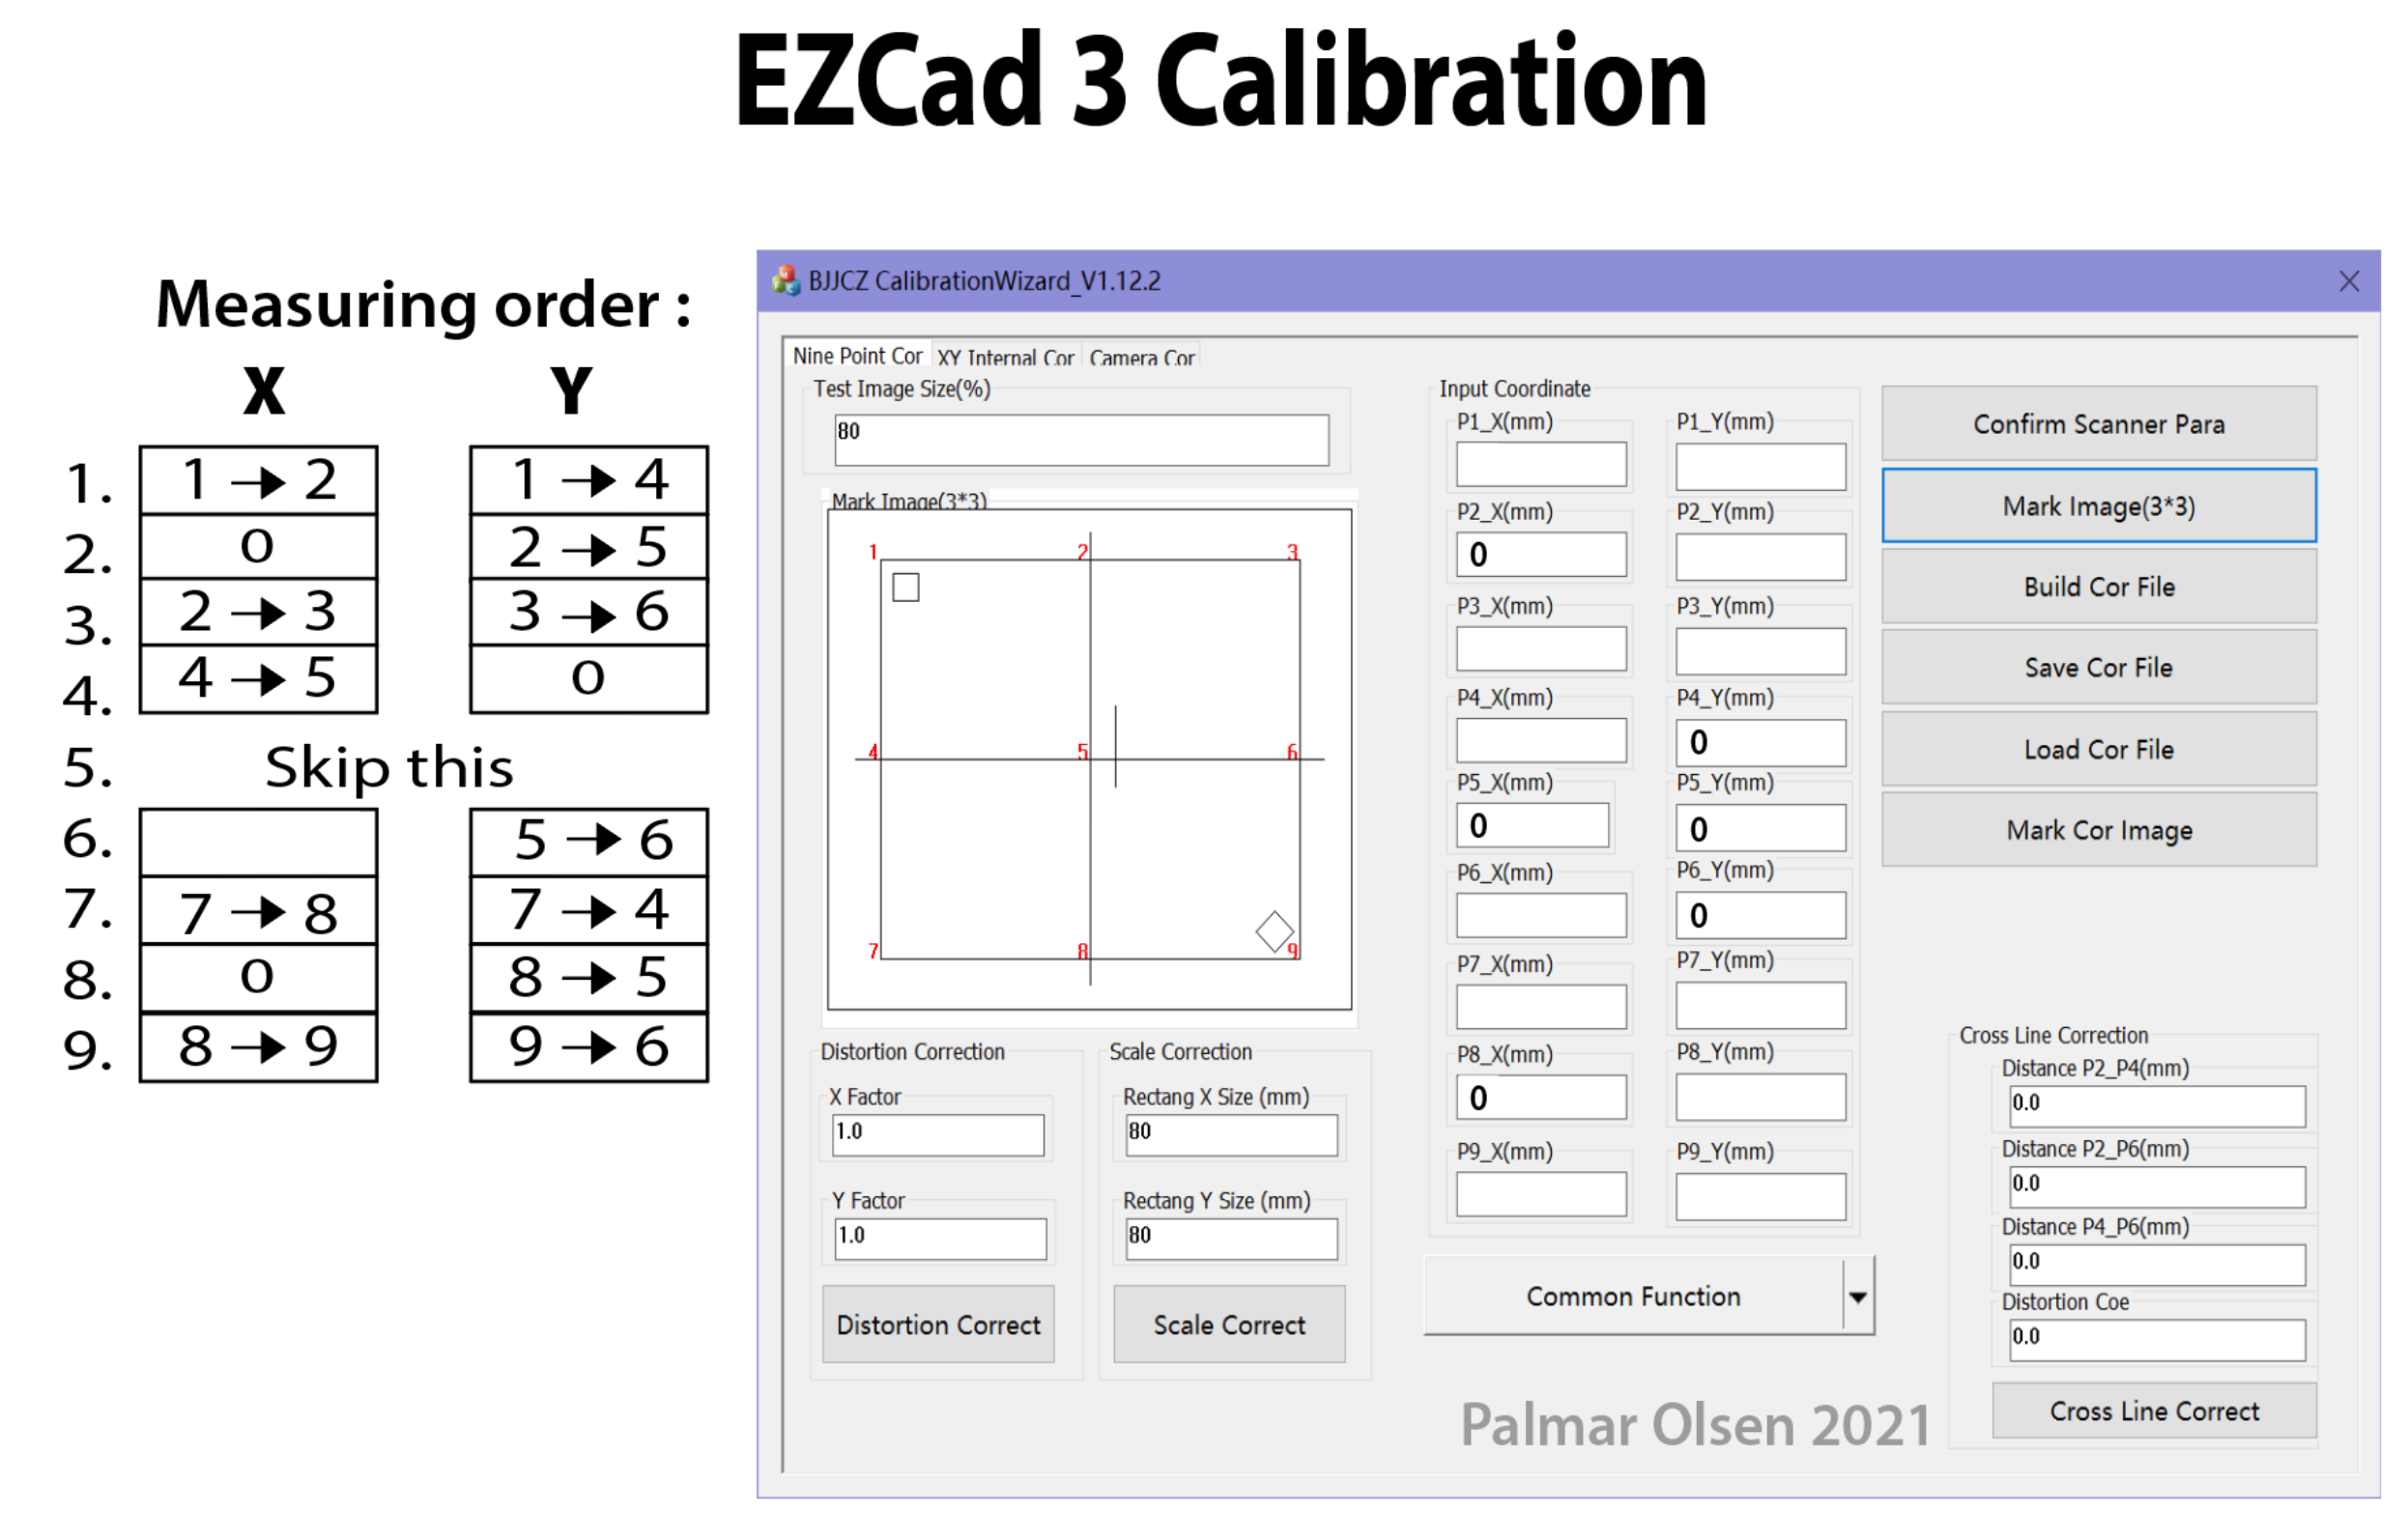
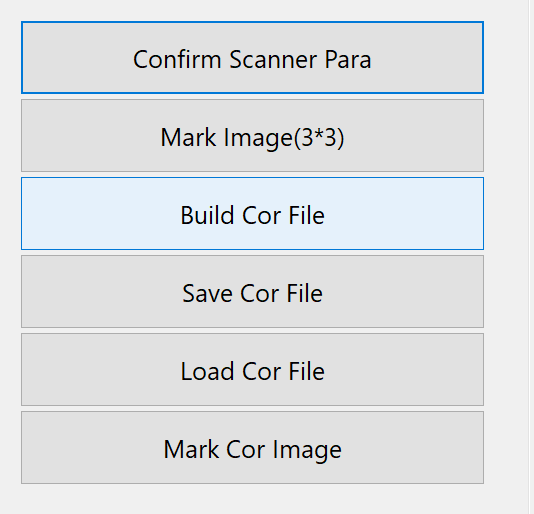
Once you have filled all the fields, Click “Build Cor File”
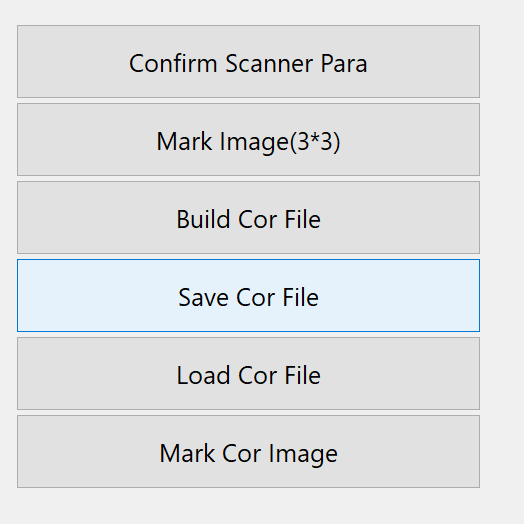
followed by “Save Cor File”.
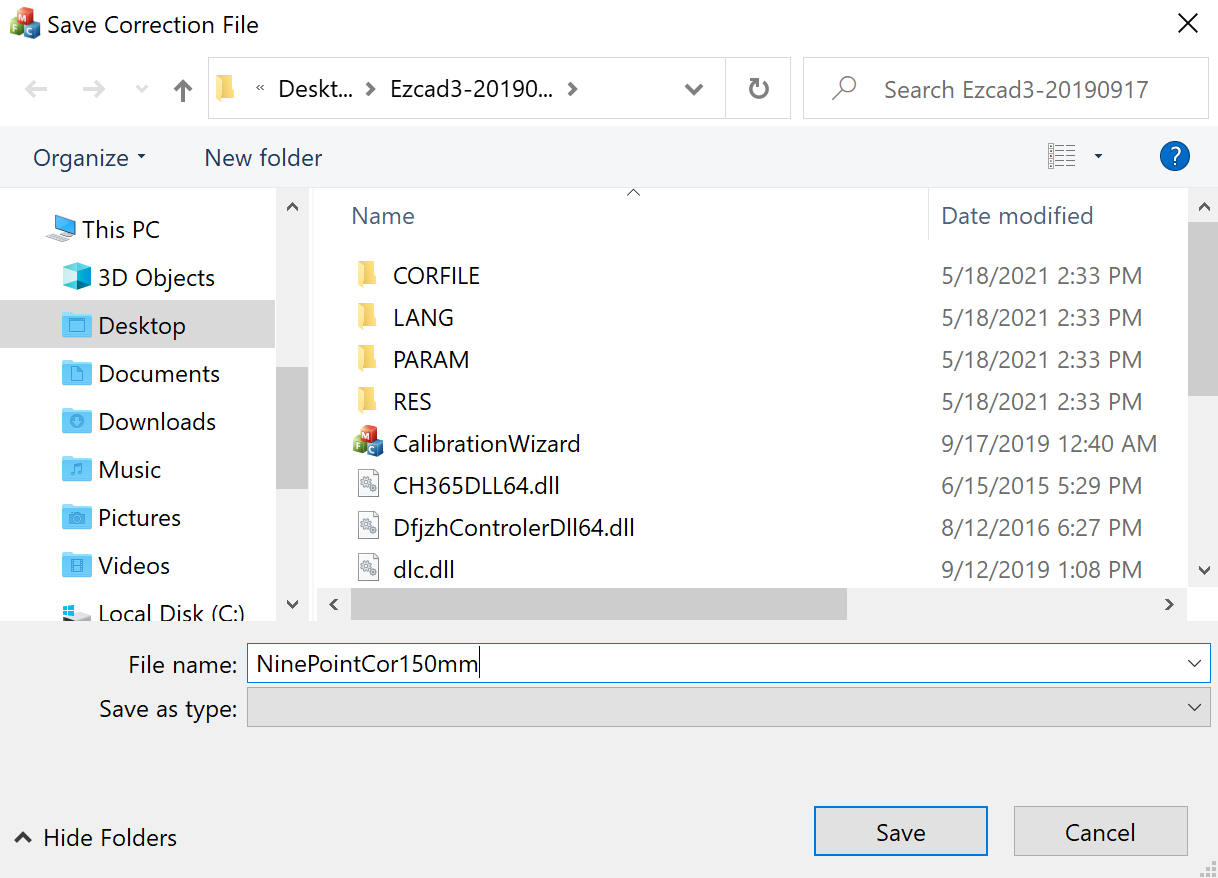
Example save it as "NinePointCor150x150mm" 150x150 is my lens.
Open ezcad3 and enter the F3 params menu,
In "field", you go to “Use the correction file” to “True”
and press the file name ... and brownse to the file you just saved.
Congratulations!!
If everything was done correctly your lens should be calibrated.
Repeat the above steps IF you have more lenses.
If I can do it, everyone can do it.
Here is another ezcad3 upgrade from Zac Zac