Motorized z-axis
I did not order an fiber laser with motorized z-axis. I thought I didnt needed it. Also it was cheaper without.
After some time, I got problems with my shoulder and reaching the handle to turn up/down to focus, was really painfully for me.
So I was thinking of adding motorized z-axis to my fiberlaser.
I tried to search to find a kit for this. No luck at all to find any kits. I asked different chinese companies,
but everyone told me it needed to be installed from their side before it was shipped out and was impossible to add. RIGHT!!
I really needed this because of my shoulder, so I sourced out some parts that I thought I needed to make motorized z-axis.
How hard can it be to add motorized z-axis to my fiber laser??
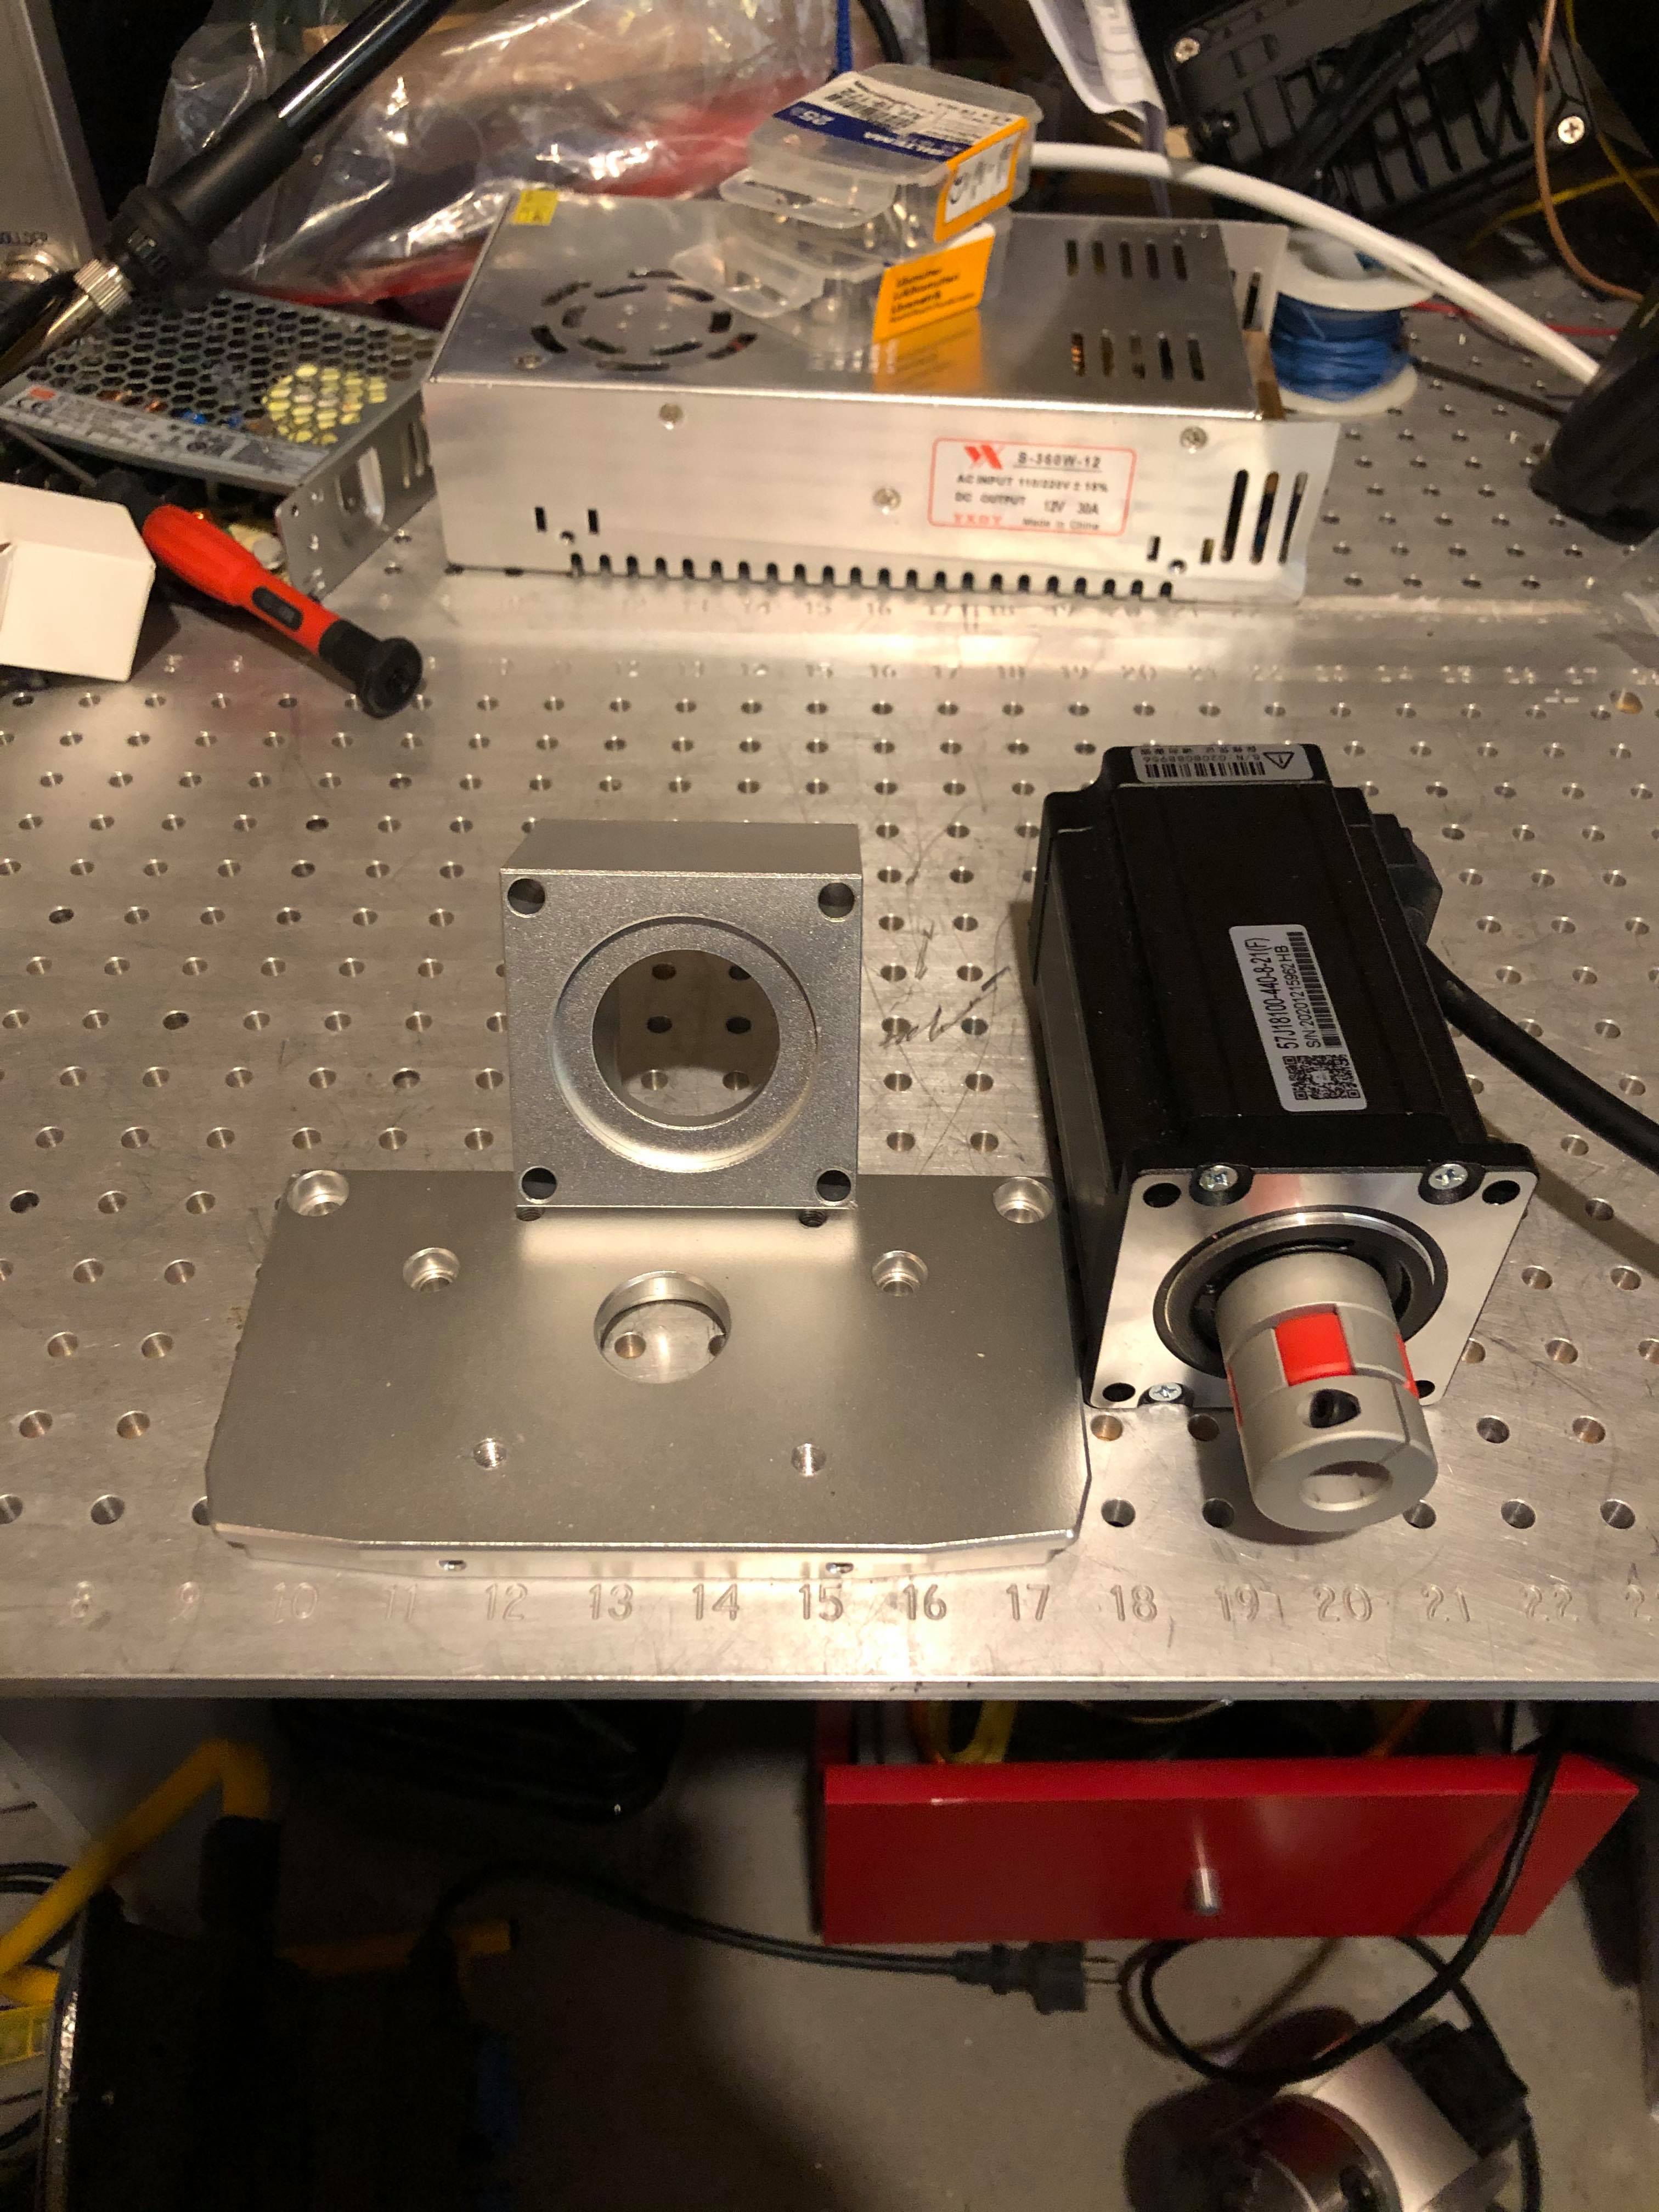
I need a stepper motor, stepper driver, 2 momentarly buttons for up and down, 24v powersupply, a potentiometer for speed control,
a motormount, a coupling, 2 limit switches and wires and the motorcontroller (BE-1103). All findings is from aliexpress.com.
Regarding the coupling, I did measure the top of the Trapezoidal screw mount with an digital caliper and it was around 12mm thick. So I needed to order an coupling that is 12mm at one side. The motor shaft is 6.35mm. So the coupling needed to be 6.35mm at the other side.
I needed an 6.35mm to 12mm coupling (D1=6.35 x D2=12mm).
Maby your machine needed another coupling size.
I will update the links later on. Maby I get a reseller to sell some of these as a ki. Also you will save some shipping if ordering from several sellers.
Updated Mars 27..
Good news I did manage to get a company to make a z-axis kit. All parts are from Rock Solid Laser.
They are honest, have good communication, fast shipping and 100% good feedback on aliexpress.
All parts ordered! Now I just need to wait 10-14 days. Sometimes it take up to 3 week by regular post.. it sux.
UPDATE Feb 12. - Some Partes received


After some testing I found out I dont need the 24v powersupply, I just use the 24v powersupply inside the fiber laser. Anyway. I will add a wiring diagram soon.
Handle

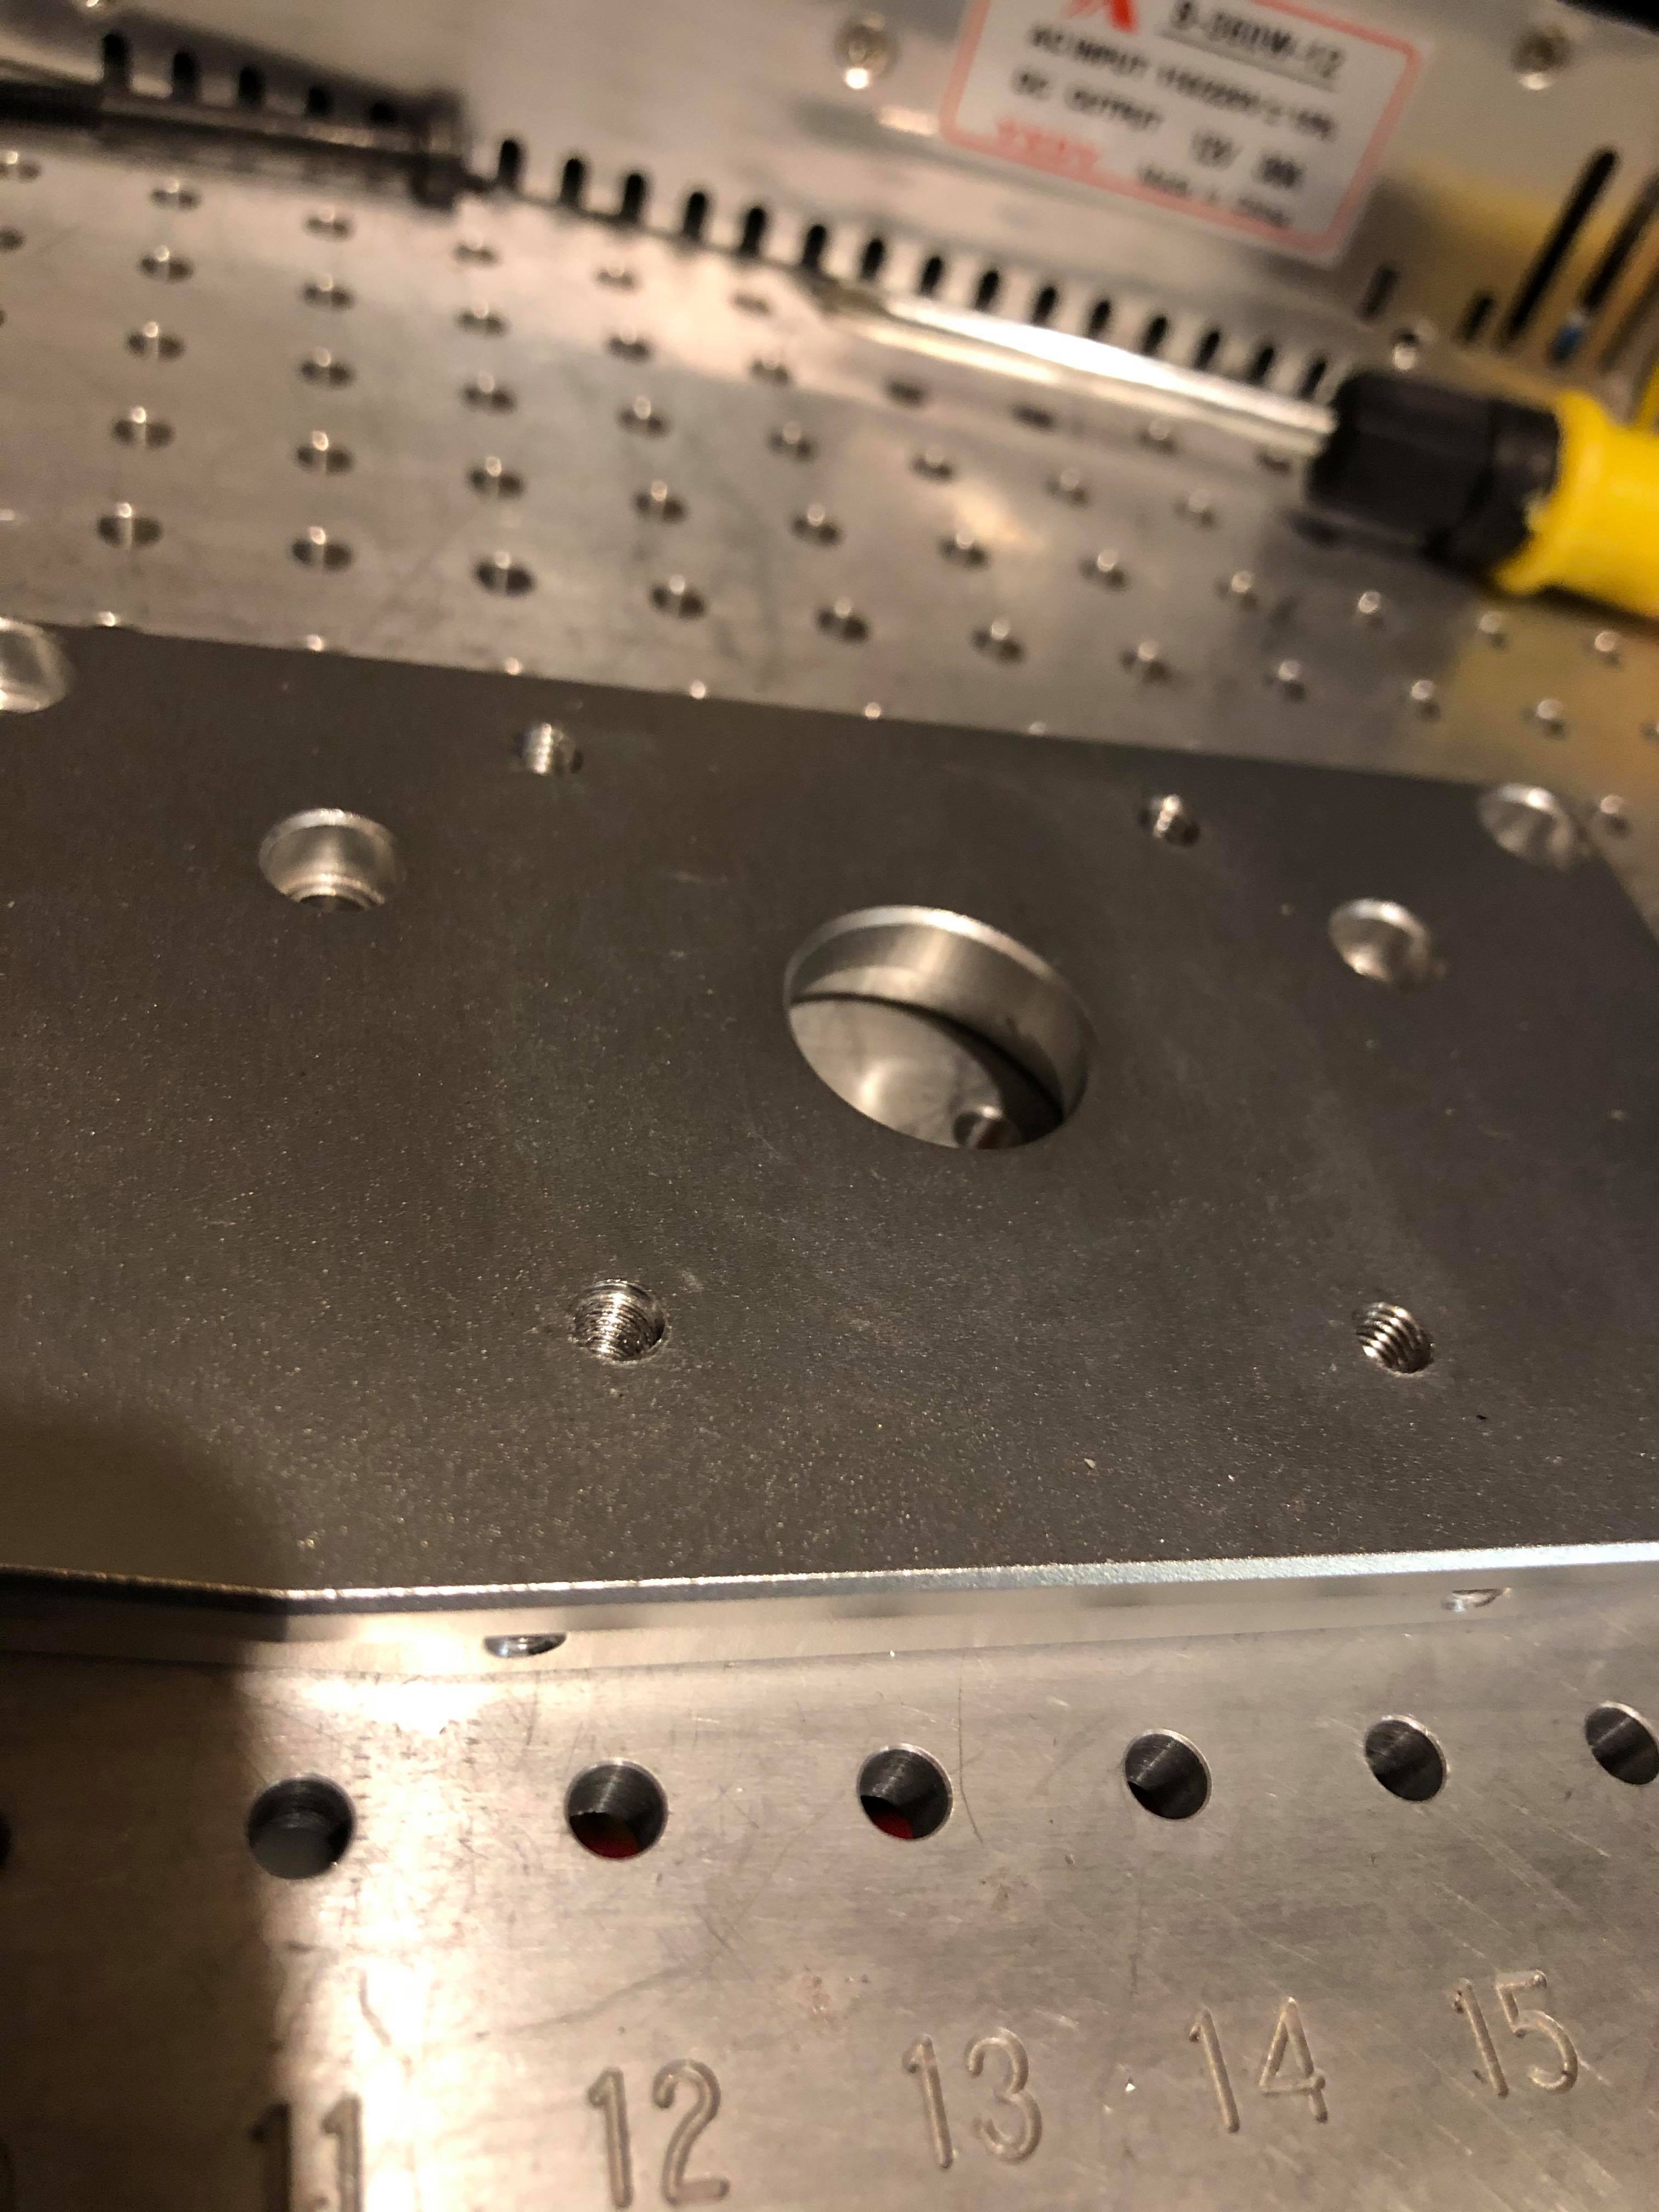
I did unsrew the top lid and measure the thickness.


I need to make 4 tapped holes for the motor mount.
So I placed the mount over the top plate hole, align it, and make some marks.
You can slso use a nema 23 motor mount template to align the holes. Drilled holes on to the plate.

Top plate finished drilled and tapped
Looks good
Motormount template to make holes in toplate
The result was perfect. Motormount, coupling and motor.
Looks fine. So far it was a easy fix.

I made this wiring diagram for easy wiring. Straight forward.
Right click and save picture. (it is bigger) Print it.

I open the fiber laser machine and this is what it looks inside. There where glue all over the terminals.
So I had to remove the one that was not in use.

Here is the psu inside the machine where I will take the power from to use on the controller.
+ V and -V The powersupply is 24V

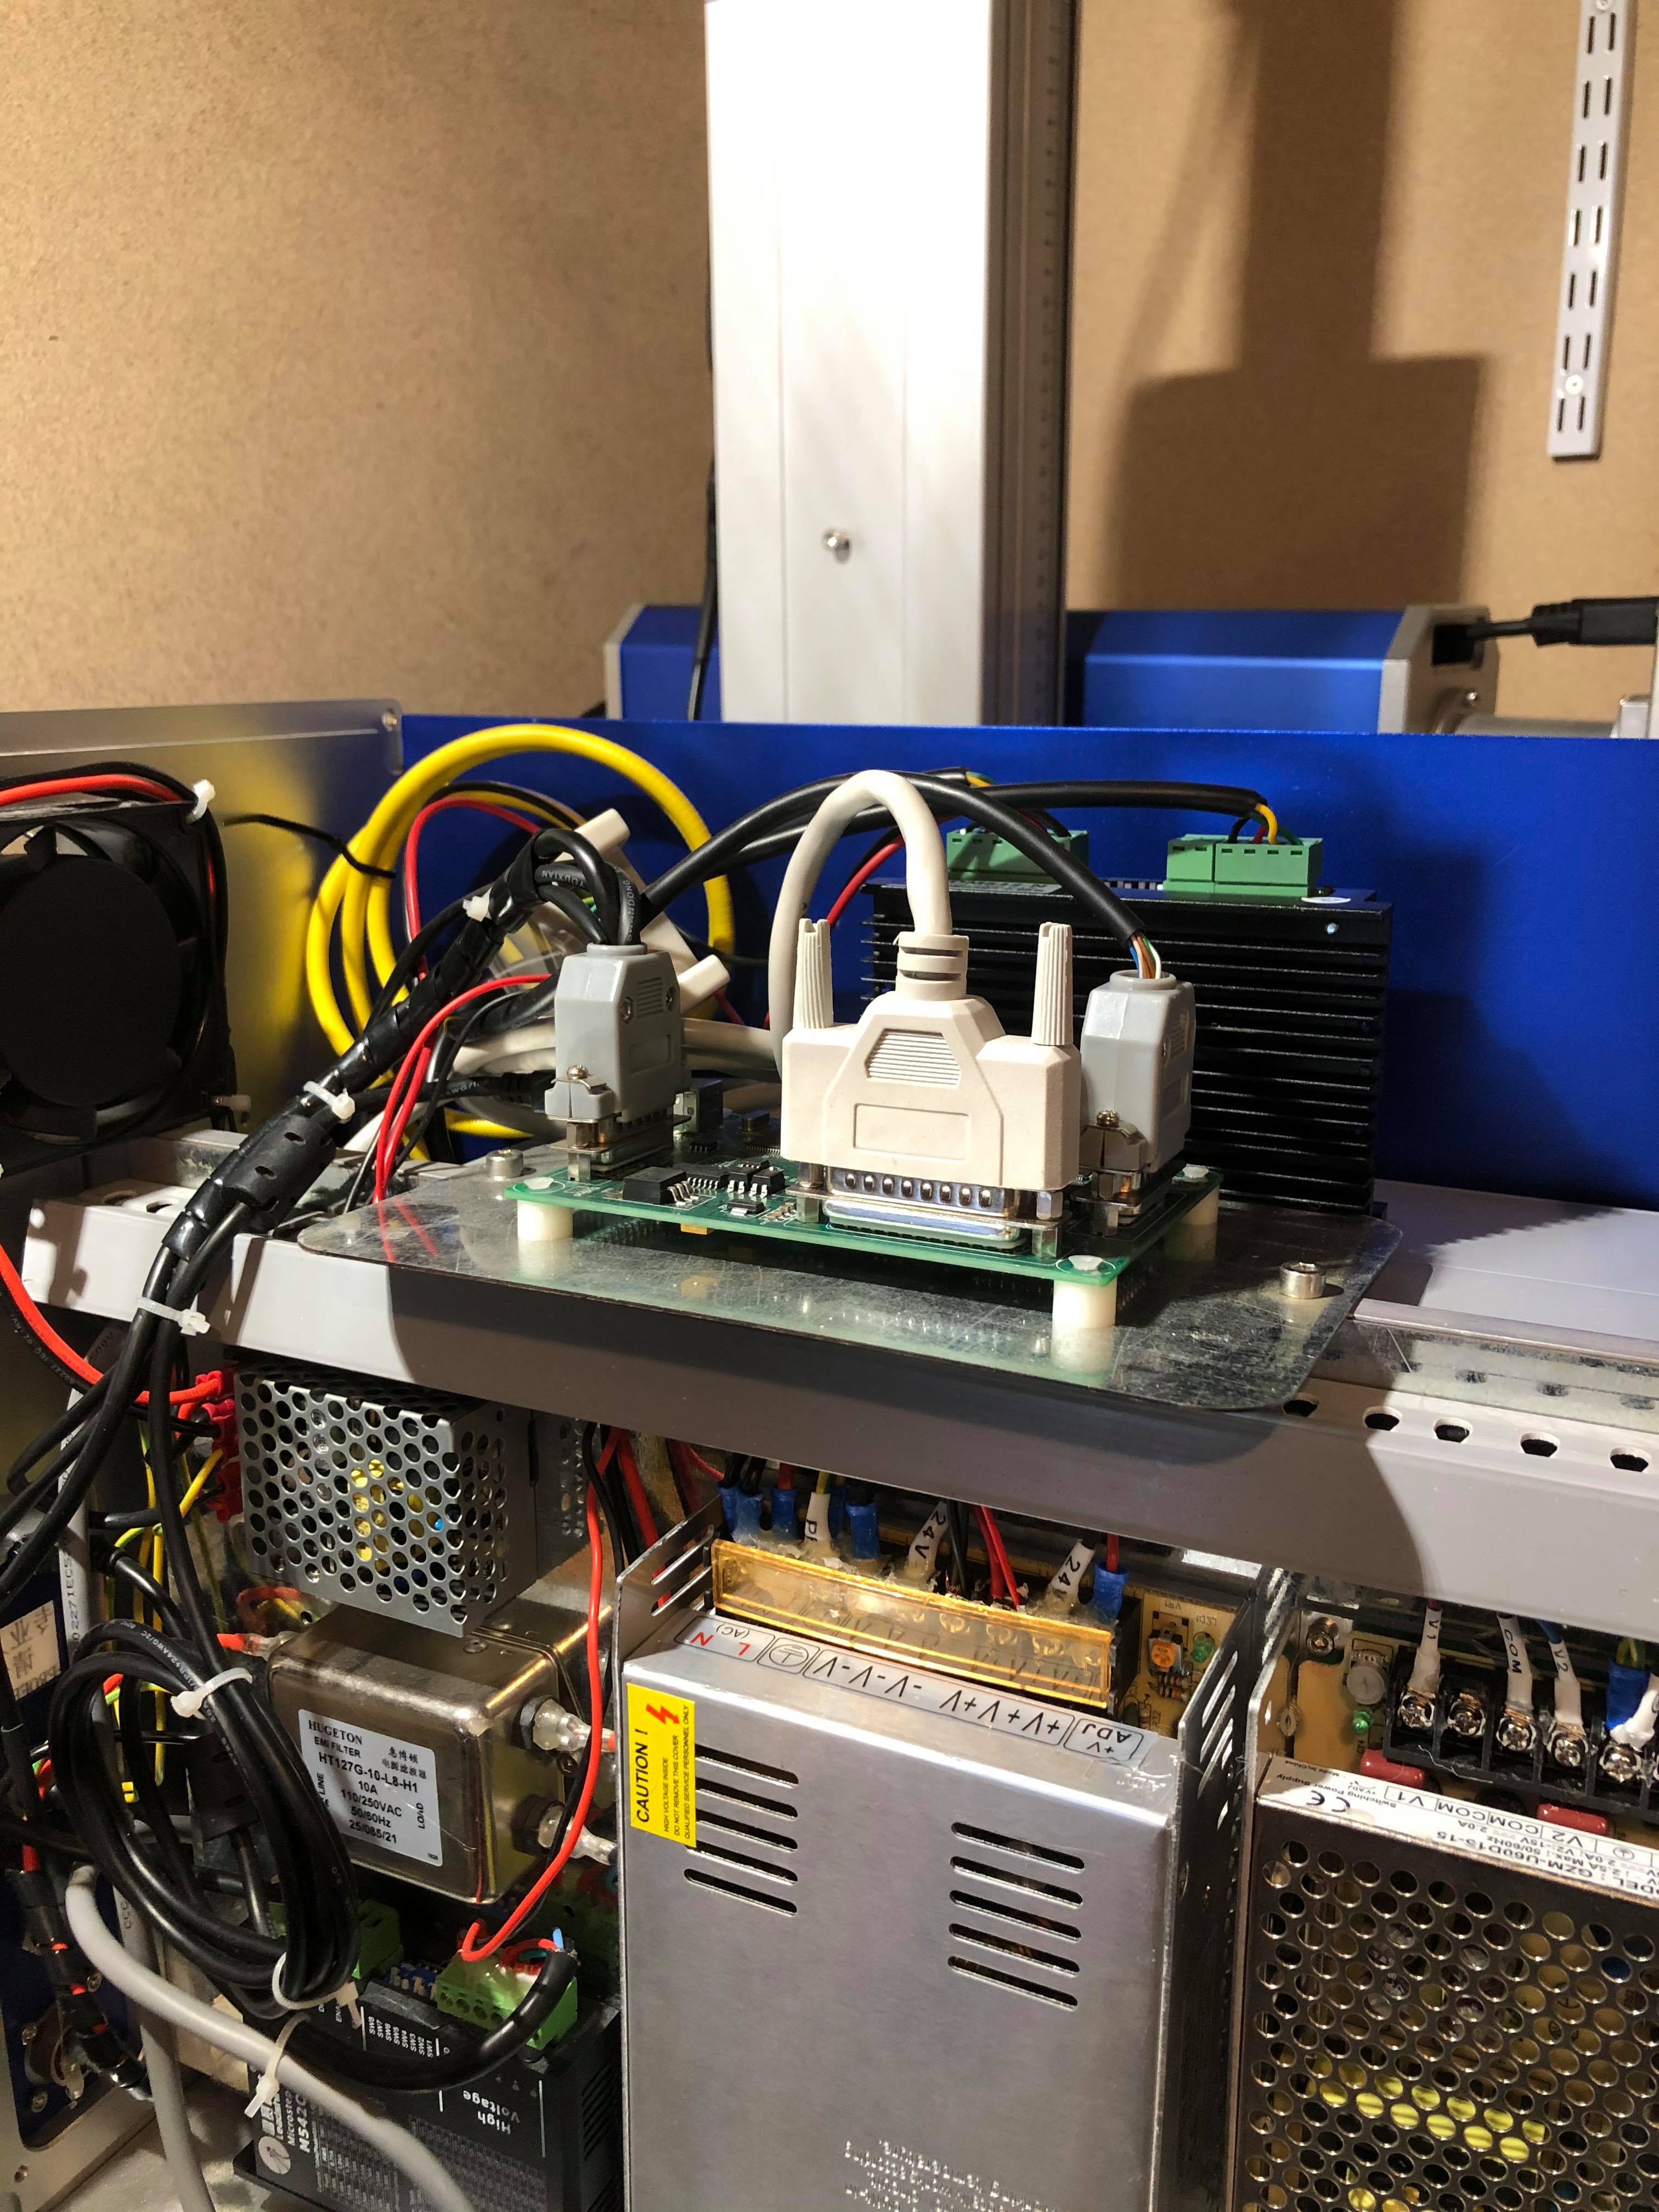
Remote box after wiring. Look good.

Remote box wiring.

Yeah, I know. Spaggeti wiring...

UPDATE April 26 Updated above with more pictures
Cleaned up abit.
Wiring to motor

My motorized z-axis bild works perfect. I´ll will do some cleanup later
and make the wires go trough the plastic tube.
Thanks to Rock Solid Laser. for making this kit to order.
Will update with more videos later..
If I can do it, everyone can do it.